I work swiftly and this only happened in a week. It all started when a book I ordered on Amazon entitled ‘1300 Real and Fanciful Animals’ arrived on my doorstep. I was sick that day and had nothing to do so my friend challenged me to draw a ‘Kappa’. Most of you may know that a ‘Kappa’ is a mythical creature in Japan that looks like a toad with a beak and an indent on the head which carries water usually known for their mischievous behaviour. So off I went and selected different body parts from different animals to create a new one. It was like playing GOD and I enjoyed it so much I ended up with a few creatures.

Fun aside, I wondered if I could make my sketches into prints so I uploaded them to photoshop and played around with print placement. Eventually I ended up with one that I really like. It’s really funny because I tried to look for something online about placing prints but could not find it. So I just randomly dropped them on to a blank canvas and I ended up with a print that I liked.
I have helped the students previously to produce samples of their design on fabric by using the photocopier. As it is toner based, the images sticks to the fabric quite well although a fixative is needed to prevent it from smudging. I tried out this technique using scrap calico and it came out really well.

However, I had to make the print permanent so I used a laminating sheet called ‘Heat n Bond’ laminating vinyl. I previously tried this product before with varying degree of success but this time I’d realised previously I didn’t heat the material long enough for it to bond with the fabric. This time it worked perfectly and the heavier weight calico also gave more weight to the fabric.
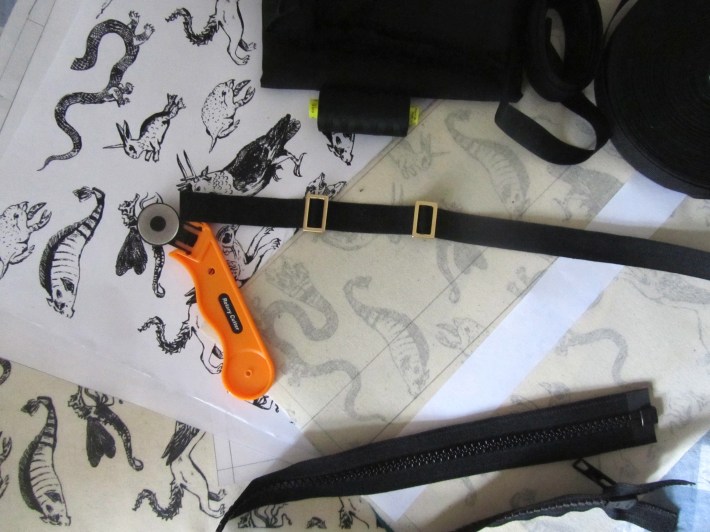
With everything printed out, I went to buy the buckles for the strap, top stitching thread and bias binding. Everything else was bits and pieces of things I had previously.
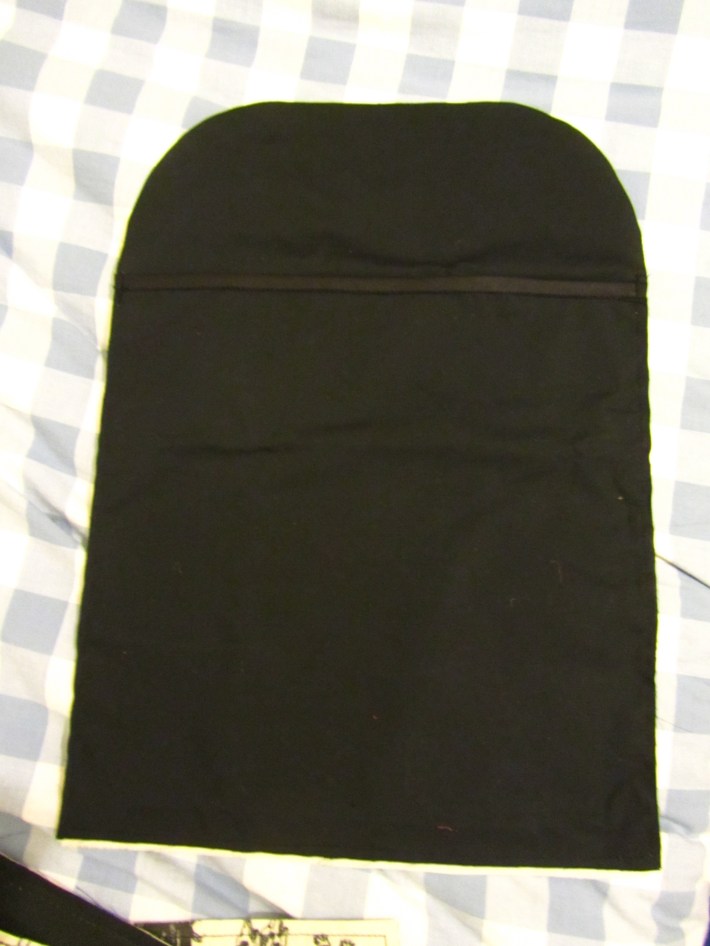
Initially I wanted to make a tote bag but decided on something more challenging instead so opted for a backpack instead. I had problems sewing the backpack up last time but with the experience gained previously, I was able to adapt the pattern and construction. I chose a tombstone style shape as it was easier to sew and meant that I could fit my laptop in as well.
I also wanted some sort of padding on the front and back of the bag so I used an iron-on wadding I had leftover from last time. As this wadding was only 0.25 cm thick, it did not add too much bulk and would not make sewing too difficult.
With the pattern drafted, I proceeded in cut up the pieces.

I made a tiny mistake in miscalculating the seam allowance for the strap to be sewn with the zips and lost 1 cm. But that worked out quite well at the end as with only 0.5 cm seam allowance, I was able to navigate around the curves easily.
Before sewing the main pieces together, I had to sewn on the strap at the back. I couldn’t find anything about strap length and exact location to sew the straps so went with my intuition on how the strap would behave around the shoulders. My estimate was pretty spot on and it sat on my shoulders comfortably.

I also had to prepare the lining of the bag which I attached to the main pieces. One of my main priority was to have a laptop compartment and this was done by cutting a separate piece of lining and sewing a binding on the top of the piece.
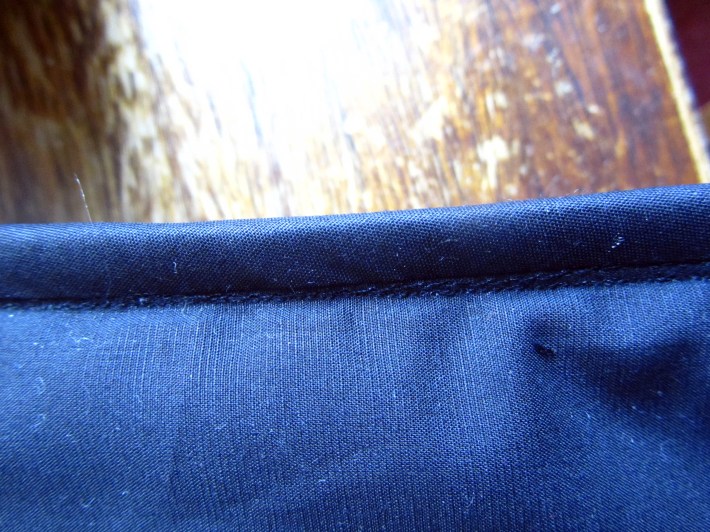
With the main pieces all constructed, I proceeded in tacking the edges together. This was mainly done as previously I was struggling to get the pieces together especially around corners and curves so I thought that if I tack the pieces together first with a very big stitch, it would be much easier later to sew them accurately together. Although it was a very time and strength consuming process (I’d realised I pricked my thumb and it was bleeding), sewing the pieces together ended up being a breeze.

To finish off the bag, I sewed bias binding around the raw edges on the inside. This also helped to reinforce the seams. I’m a bit paranoid when it comes seams ripping so reinforcing the seams calmed my nerves.
And in less than a week, I made a backpack using my very own sketches, printed by myself, with patterns I drafted myself and sewn together myself. It was a very tiring project but I had to say I thoroughly enjoyed every minute of it especially the part when I was drawing the creatures as my friends got quite involved in it as well.
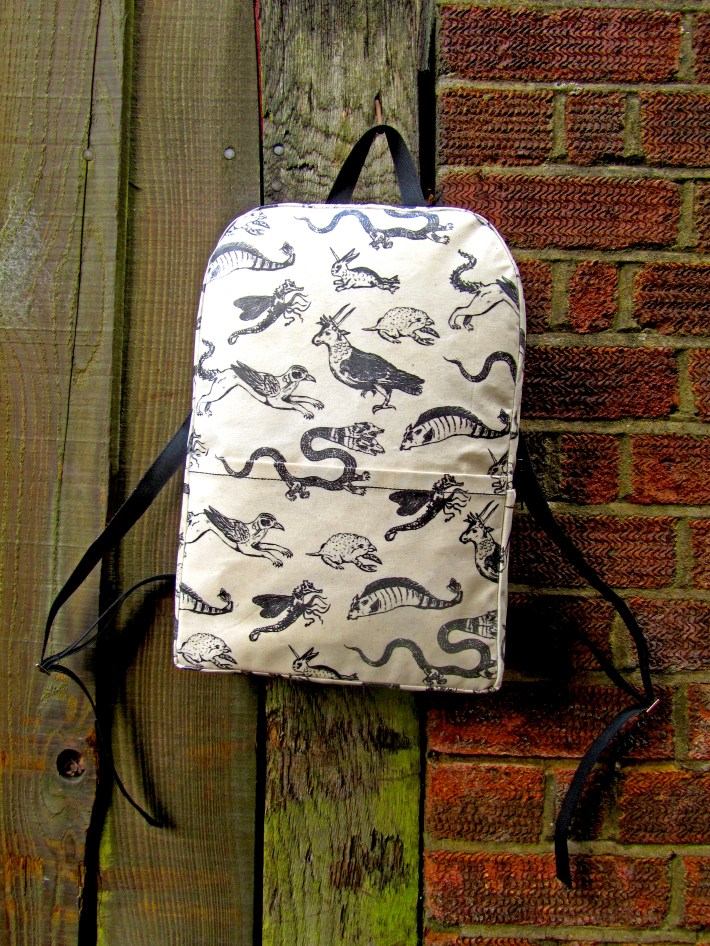
I showed my landlady the bag just now and she absolutely loved it. She asked me to sell it on the market but until I test out the wear and tear first, I’m a bit hesitant. I start moaning when things are made badly and fall apart quickly so I must ensure that the things I make are built to last. But I have to say that this was the cheapest project I have ever undertaken. Most of the materials were lying around my room and some were destined for the bin.

A word of advice though. If you do want to try printing your fabric on the photocopier, it would be useful to cut the fabric to size, back it on copy paper using an adhesive spray and run it through the by-pass tray. Toner based photocopier works better than inkjet and you must always use a fixative to prevent smudging. Until the print is sealed in some sort of way (like the vinyl lamination), it is not washable. Also the size of your project depends on the size of paper the photocopier can take.
And last but not least, try it at your own risk. We had times where the fabric got stuck in the photocopier and it had to be serviced. I’m sure if any photocopy engineers read this, they would be rolling their eyes in disgust and would be advising against it. But this might also give them an idea to create a low-cost fabric printing machine.

Pingback: In-VEST-ing in Summer! | Stephen Yong
Pingback: The Leather Bag | Stephen Yong