I am sure we are all guilty of it – reading about something and being told that it’s difficult and we shouldn’t attempt it! And there I was going, “Phfft! How difficult can it be!” Famous last words!
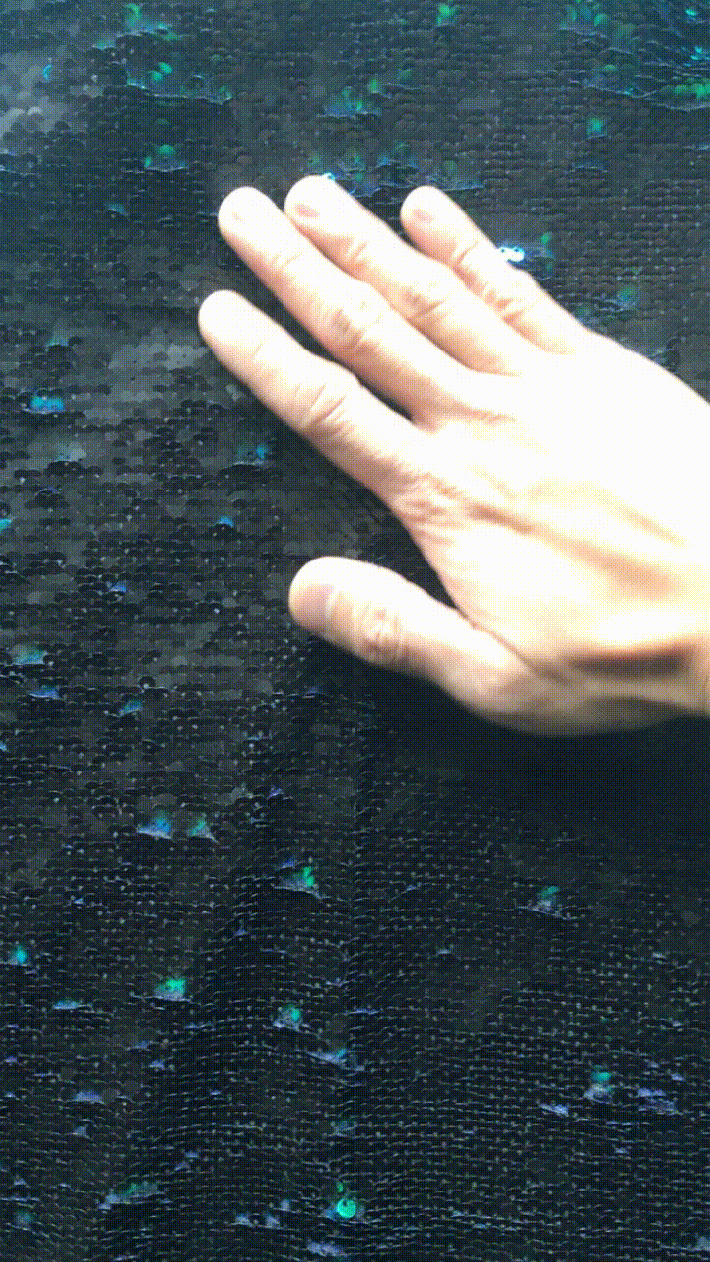
So what’s this difficult thing I am talking about? Sewing on sequinned fabric…
I’d always wanted a garment made of sequins, as it not only look glamorous but is also fun to wear. Besides, it’s one of the things on my bucket list!
But how do you actually sew a sequinned fabric in the first place? I spent an afternoon researching online blogs and books of sewing sequinned fabric and, in a nutshell, the results are as follows:
1) Do not attempt it!
2) If you are attempting it, get ready to regret it!
3) If this still hasn’t put you off, think again!
4) Don’t forget the safety glasses, as needles tend to break when sewing sequins.
After all the warnings, I realised there is a lot of prep work involved before the sewing, such as trimming each individual sequin on the seam allowance, a lot of basting, and a lot of sewing back sequins on bare spots too. Initially I was afraid of taking on this task, until I saw the most beautiful two-toned sequin fabric.
My mind was made up and when thinking about what to make, a sweater/shorts combo popped into my head (another addition to this year’s spring/summer wardrobe!)
Bearing in mind the prep work, I decided to eliminate as many seams as possible, so I merged the front and back piece of the pattern to make it one continuous piece. With that done, I laid out the fabric on a flat surface, placed the pattern on, carefully marked it, and then carefully cut the pieces out.
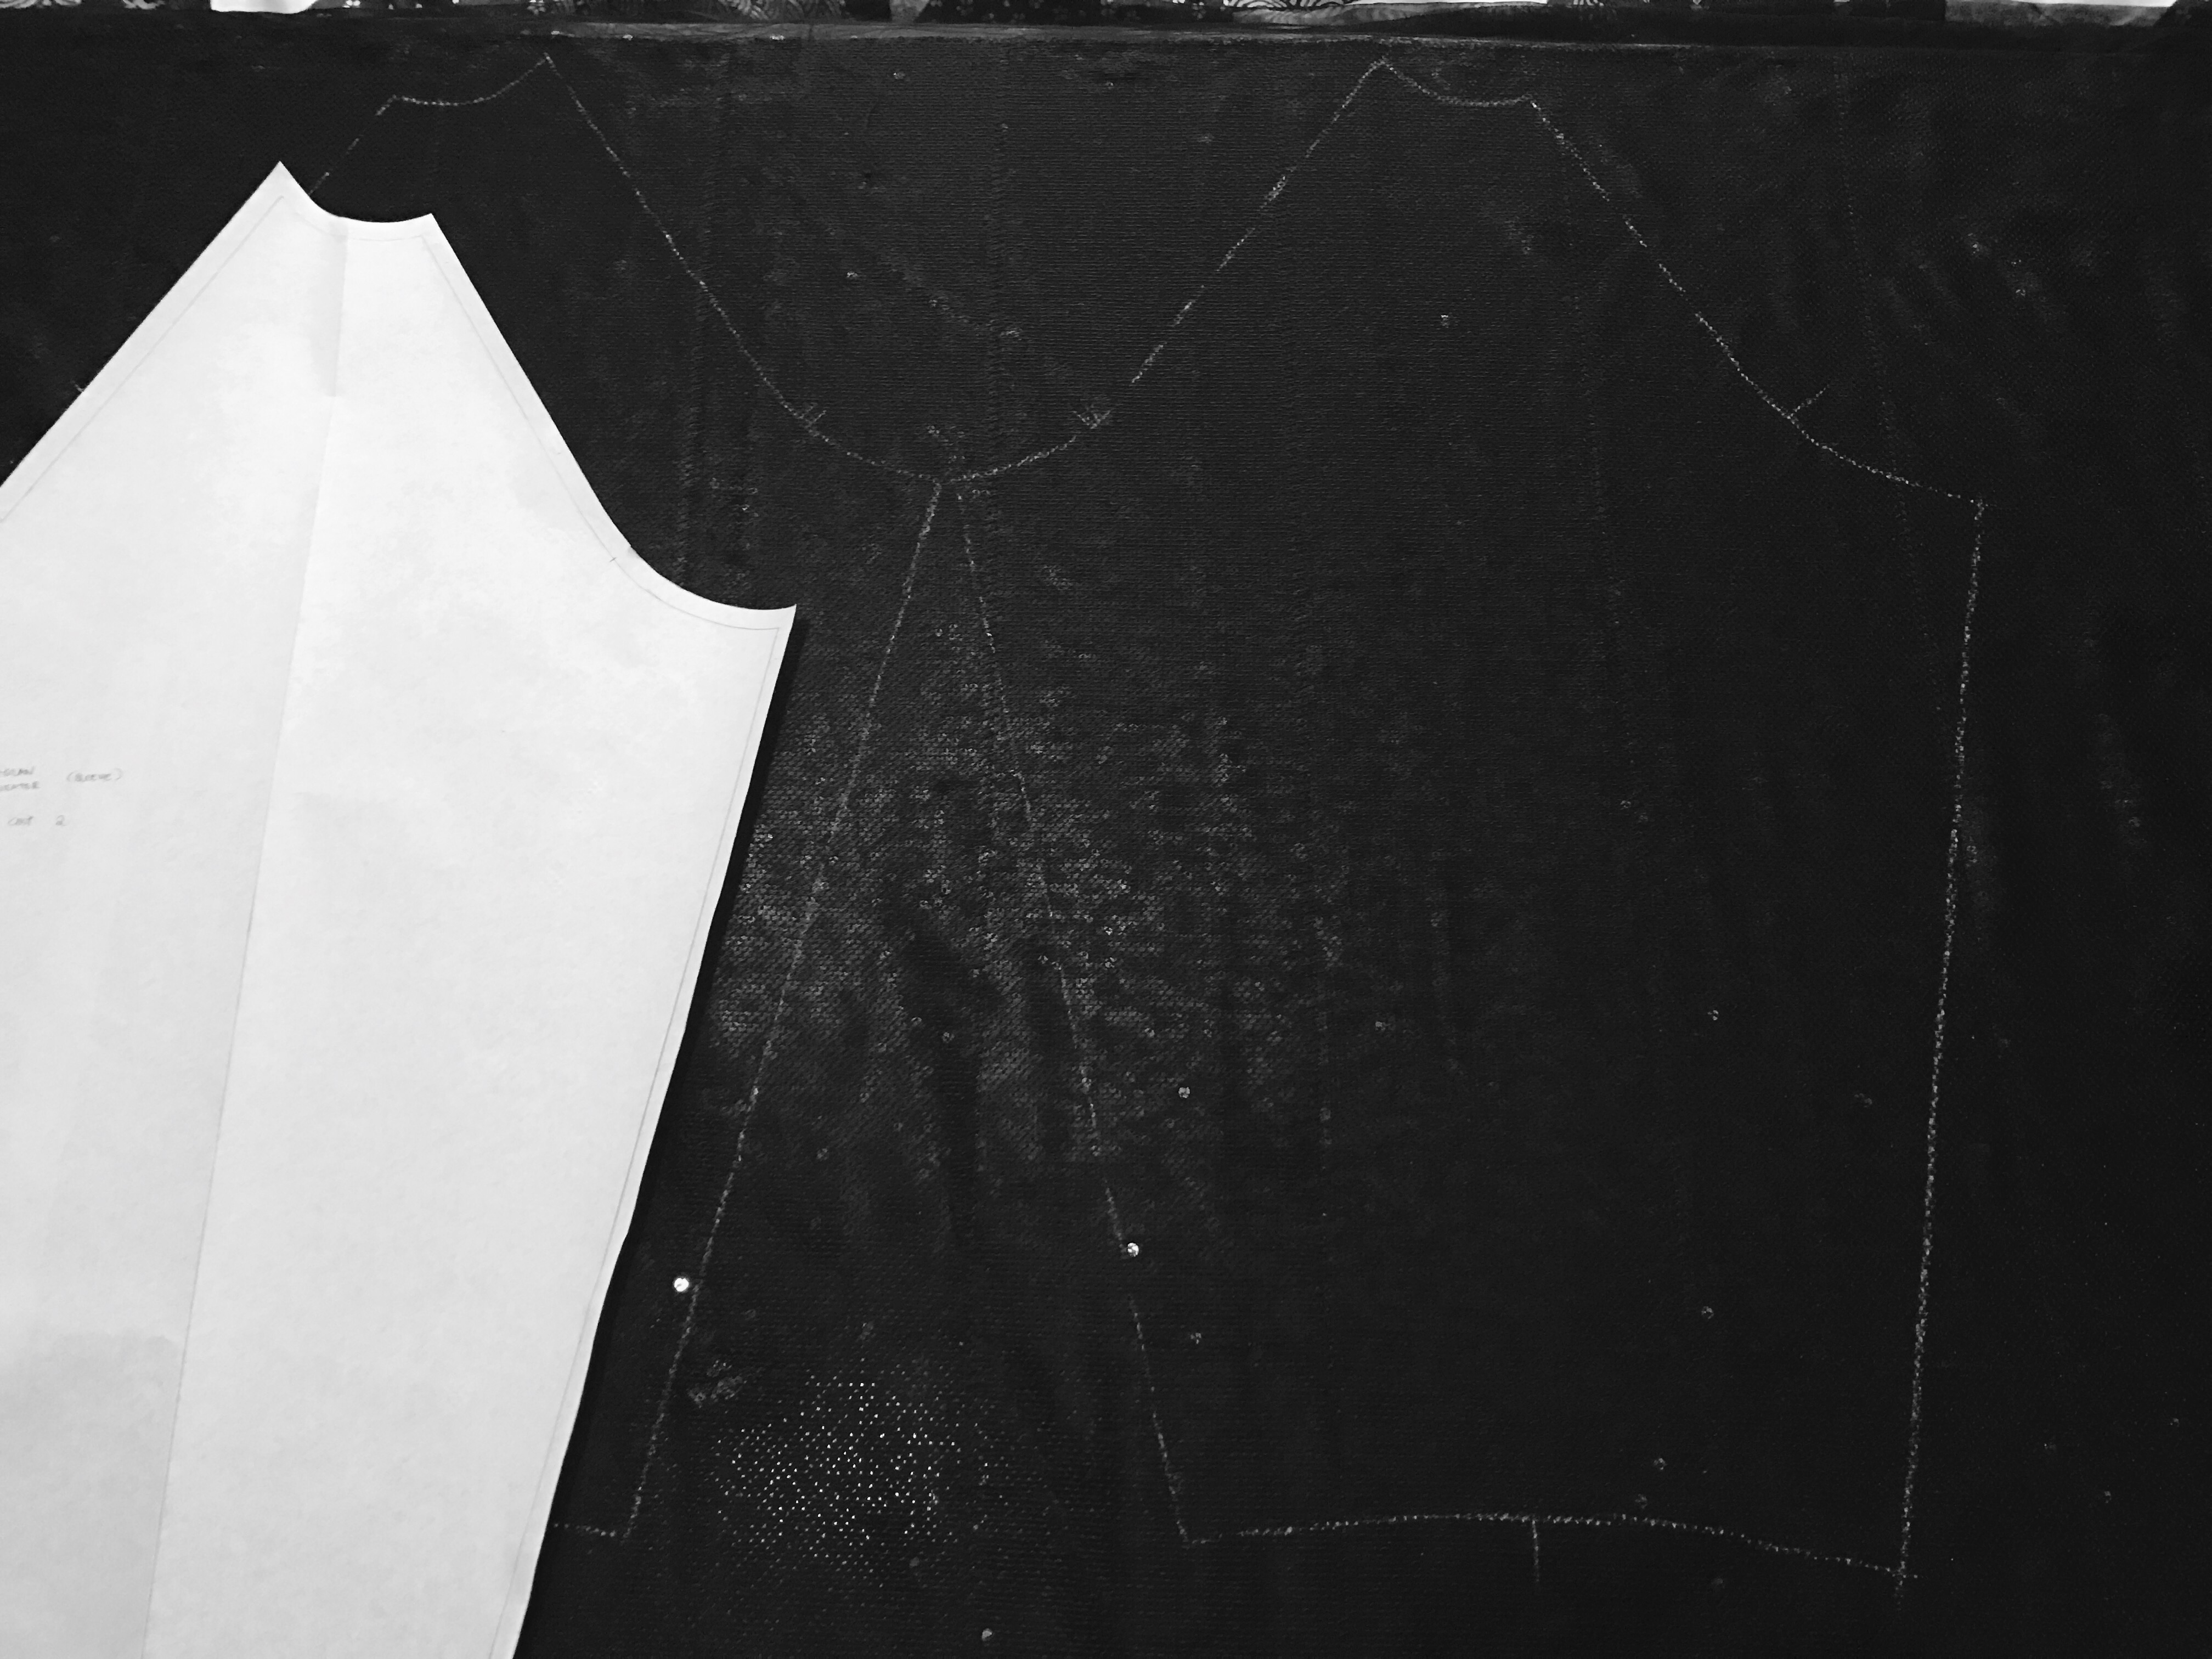
Initially I took the sequins out on the seam allowance, but after spending 15 minutes on a tiny section, I realised that I have a life and so I left the sequins on! I tried a piece of scrap sequinned fabric on the sewing machine and it seems to sew fine. I used a medium weight sewing needle, which was able to punch through the sequins without snapping and so I proceeded to sew the patterns together without too much difficulty. I did, however, spend some time trimming away sequins that were popping out on the seams, but using a pair of diagonal pliers helped the process a lot.
This project was quite challenging, and I’ll admit I was initially quite apprehensive about it. But seeing the outcome, I can say I have no regrets.

This is such a fun piece! I’m not only constantly stroking the sequins but also drawing on the sweater!

After making this sweater, I was a bit hesitant in sewing the shorts. The sweater was a lot of hard work and thinking about the pockets and elasticated waistband for the shorts just fills me with fear. So I did what anyone would do; slept on it for a few days. When the dread was finally gone, I got on with it and cut the patterns for the shorts.
To prevent the sequins from poking me on the waistband, I decided that this time I do have to take the sequins of the seam allowance. However, as the waistband is just a strip of fabric, I cut it out following the thread lines where the sequins were sewn. This made life really easy as once I pulled the main thread out, the sequins will just unravel.

The waistband was the bit that worried me as I wasn’t sure how it was going to work out with an elastic inside but it actually turned out fine.

So the shorts is also done but alas, the weather is not warm enough for me to put this ensemble one. After all, I need it to be sunny as well so I can be a ‘Disco Ball’ to this otherwise bland and boring world!
In the meantime, I will be spending most of my days picking up stray sequins that was scattered everywhere during the making process. Just when you thought that the little buggers has been vacuumed up, another one pops out from hiding in the least suspecting places!

Pingback: Never Say No to Glitter! | Stephen Yong