My mum and sis came over to visit me during the summer. It made summer even more special for me as we could reconnect as a family again after my dad’s passing last year. We spent a lot of quality time exploring many scenic places in the Cotwolds and also spent a lot of time just relaxing at my place. That’s when my mom told me something I’d already known but have been ignoring for a while.
‘Your quilt stinks, is falling apart and should be chucked out as soon as possible as it may be harbouring germs and diseases!’
Oh dear! Truth hurts but I had this quilt for a good 12 years. It was a hand me down from a good friend of mine before he left UK but mom is right. Judging from the bits and pieces I pick up every morning, this quilt has gone past it’s expiry date.
One very boring night, I joined Pinterest and browsed through the amazing array of quilts out there and me being me, I decided that I should try to make one myself.
I went to eBay and started browsing the materials available and eventually decided on a mixture of Indigo and white Japanese prints. I thought this was great as I had some left over cotton kimono fabric that was of a similar colour palette.

Being a complete novice in quilt making, I decided to employ my engineering skills by drawing and calculating the workings of the quilt. It reminded me of my traffic engineering days when I designed the paving patterns for the footway.
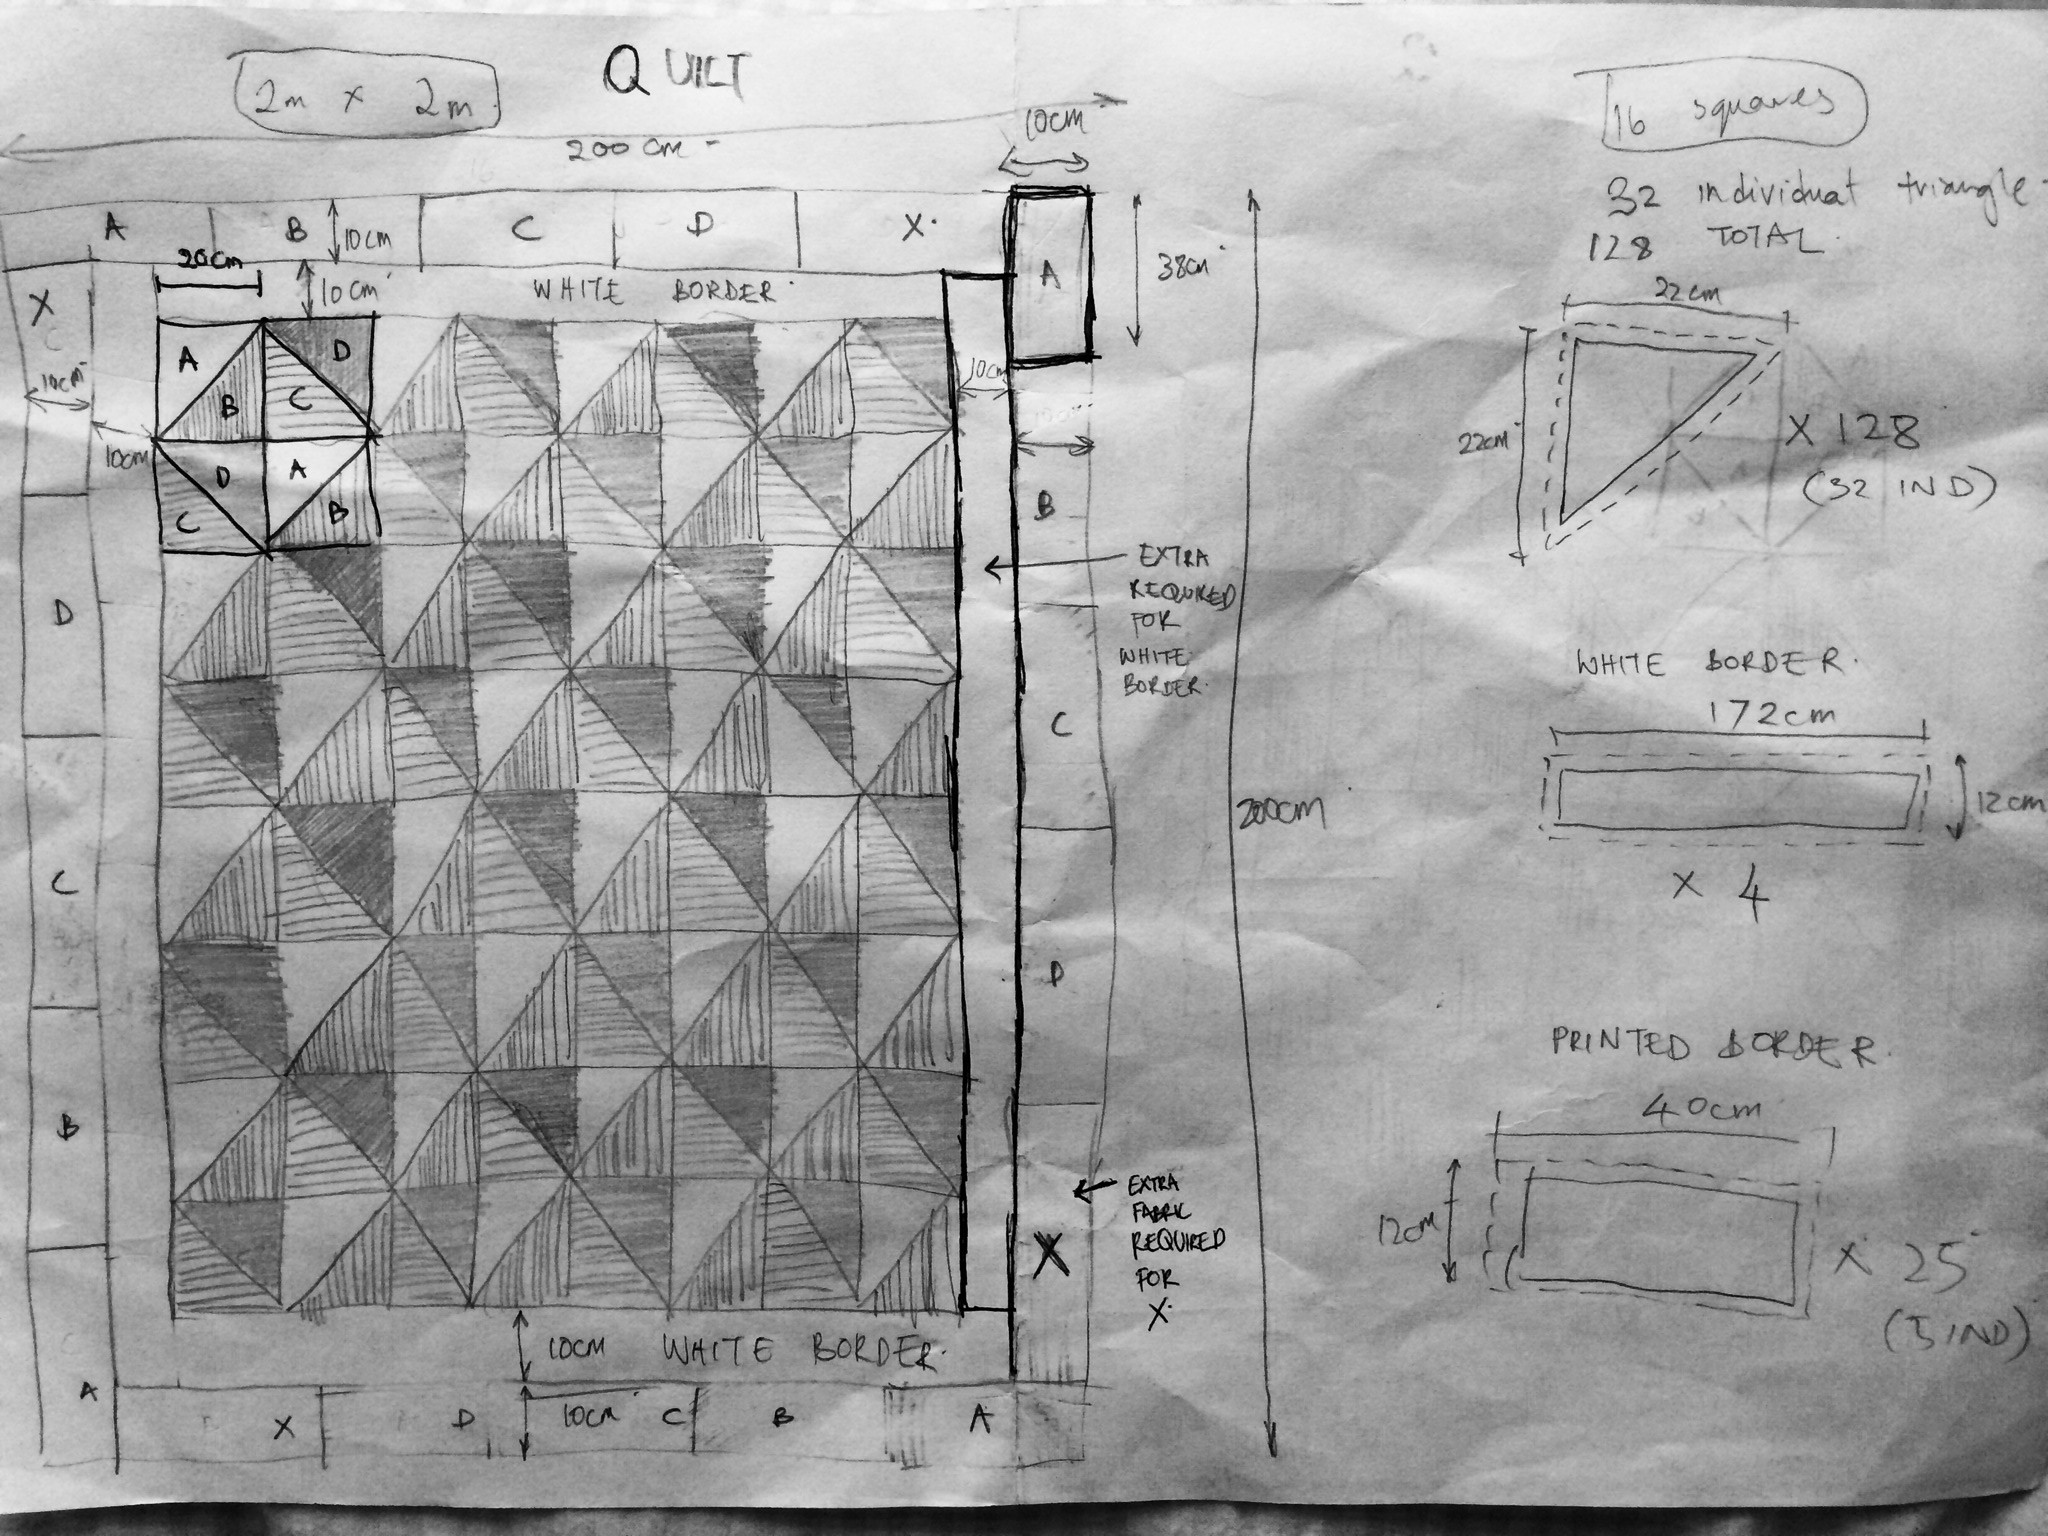
A few days later, all the materials arrived and with a template ready, I started cutting out the shapes. I have to admit that the level of preparation in getting all the pieces ready a bit too much (three hours spent in cutting 128 triangles). All my effort paid off though, especially when sewing the pieces together and thanks to the wealth of information on the Internet, everything went without a glitch. Being extremely pedantic, I did end up unpicking some pieces as I wanted to ensure that all the corners matched perfectly!
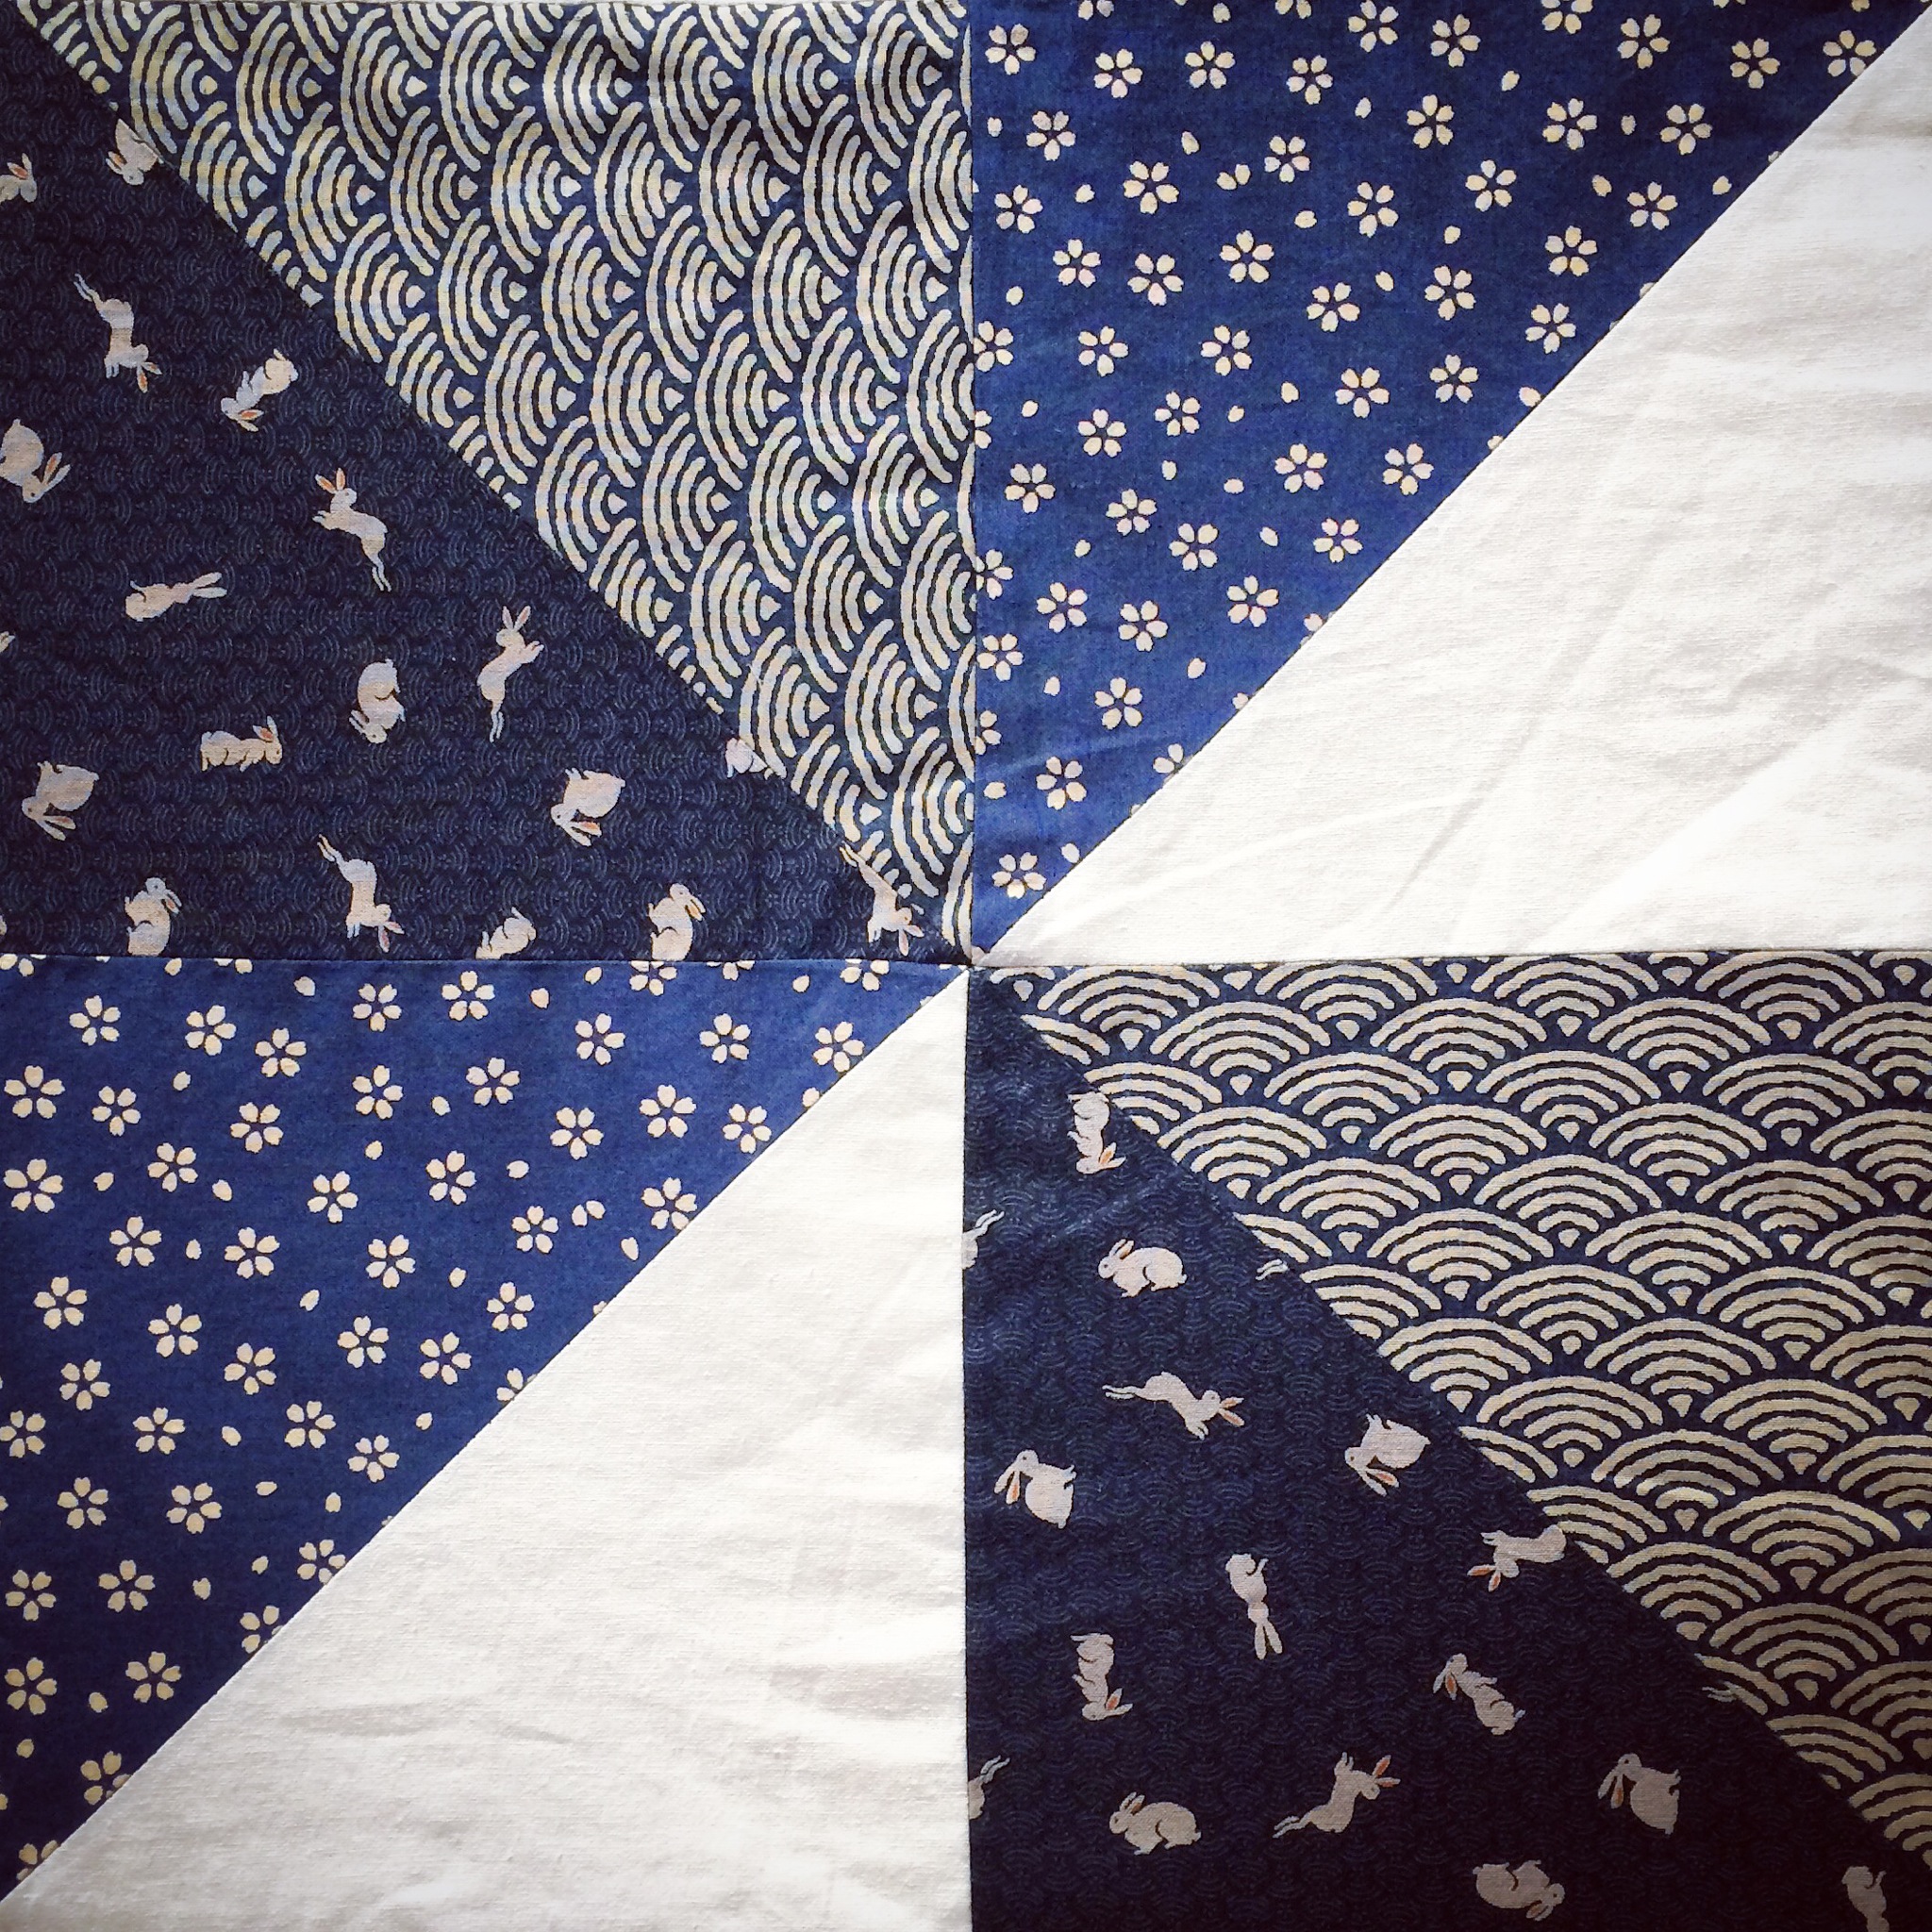
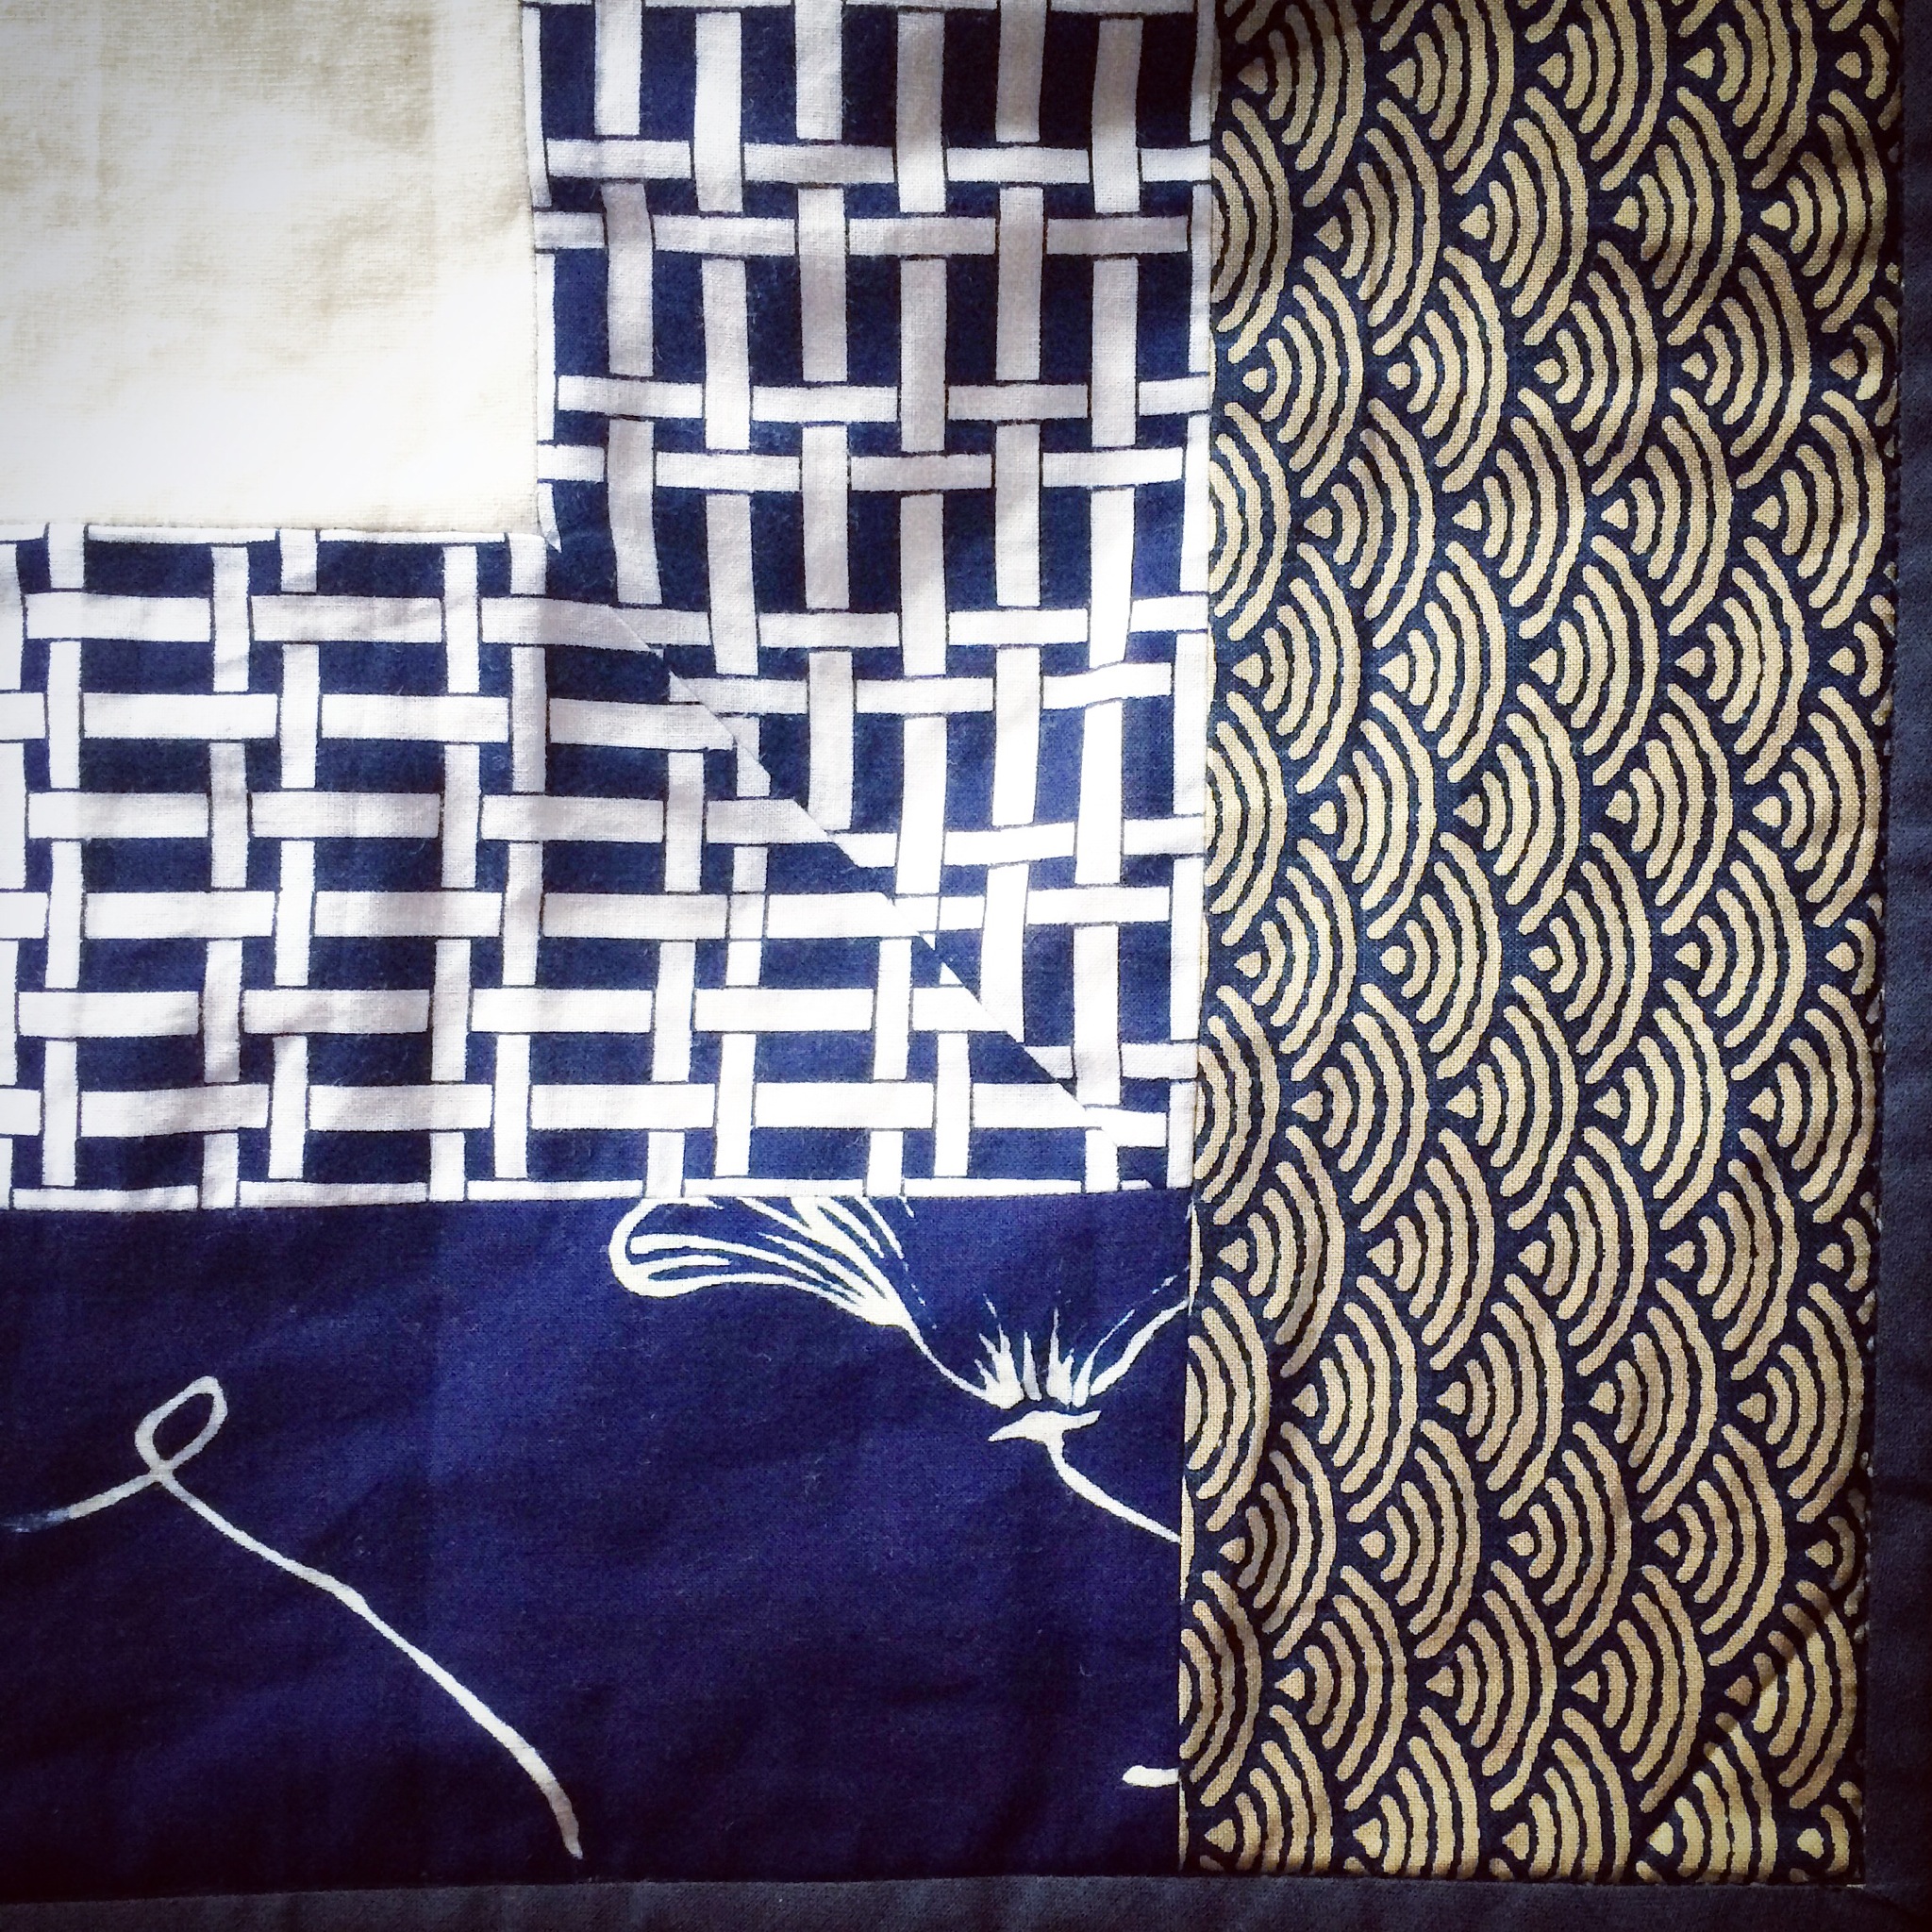
In true quilting style, the leftover kimono fabric scraps from my previous projects were used in the border of the quilt.
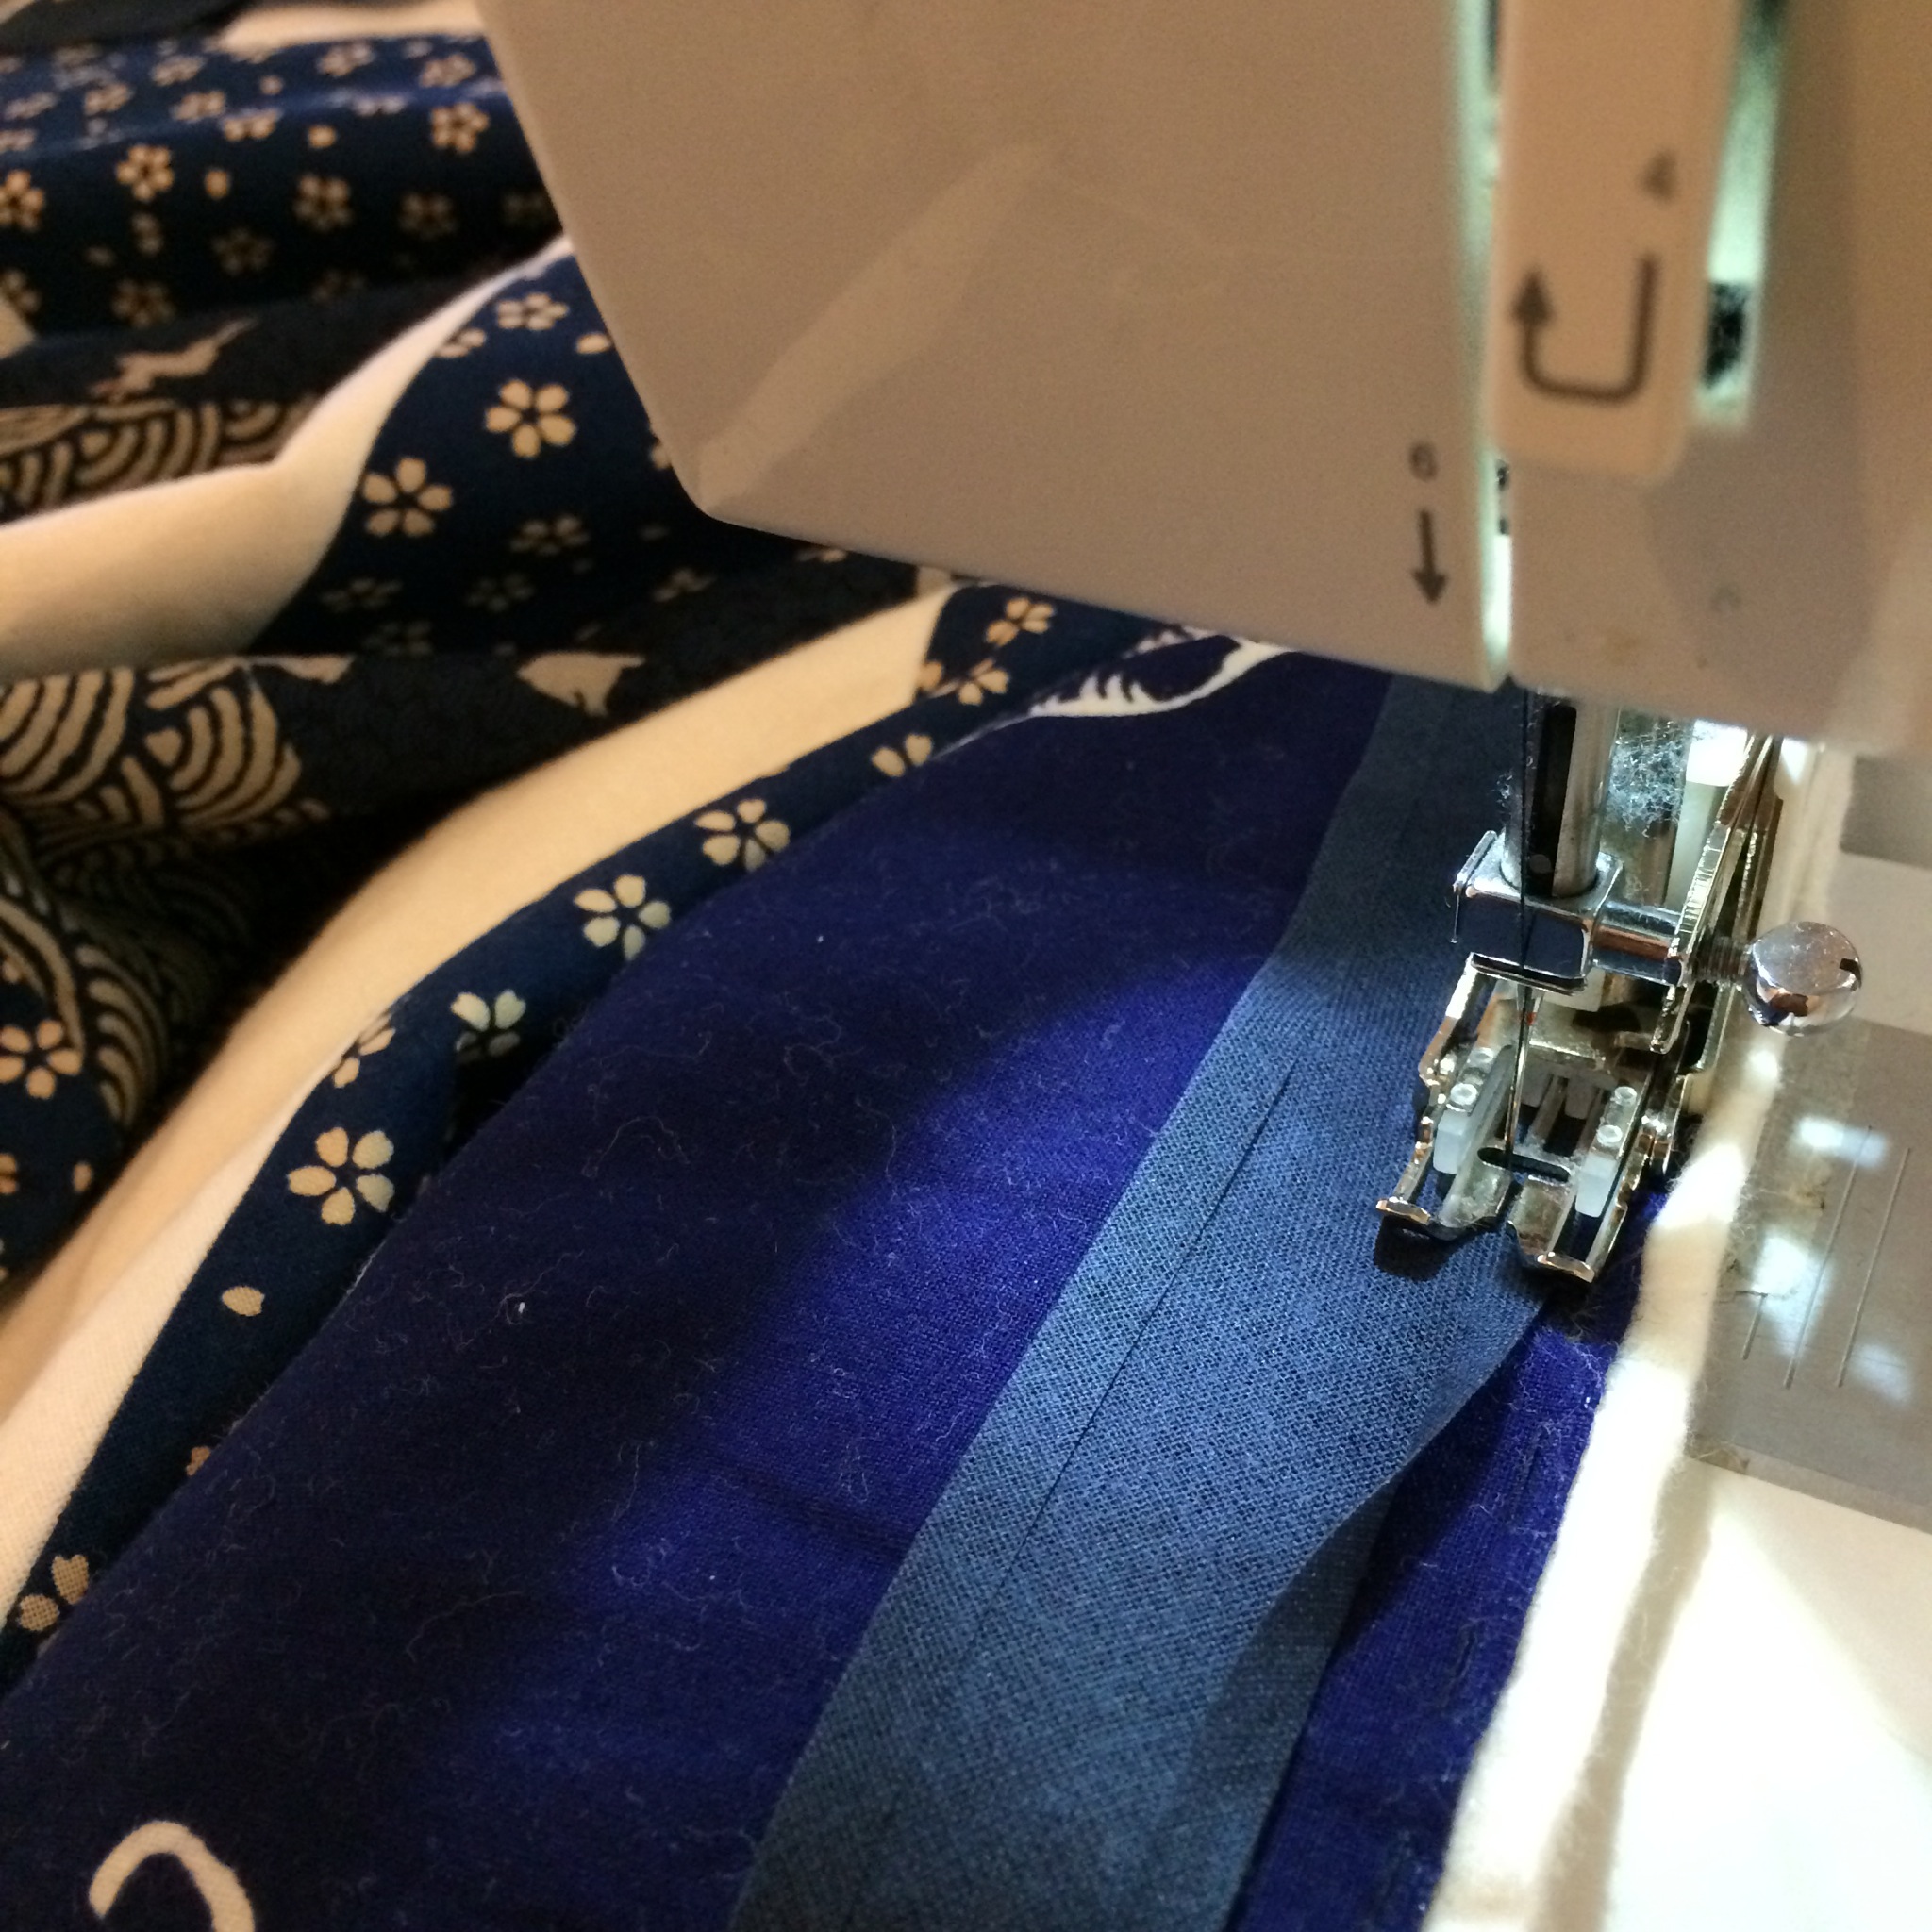
With all three layers (quilted pieces, batting and backing fabric) pinned together, I sewed the bias binding to finish the edge of the quilt. Using a walking foot helped greatly in getting this task done.
With everything pieced together, I eventually ended up hand sewing all these layers together to ensure that everything stayed together.
It took me a solid 3 days to finish this quilt. It is not a very complicated pattern but I do have to admit that the amount of preparation and precision in sewing is essential in achieving the best results. It was almost like a test in accurate pattern drafting and precision sewing!

I thoroughly enjoyed making this quilt and for my first try, I’m quite proud of it. My fingers hurt from too much hand sewing so in the future, I am going to try and take it easy instead of rushing everything.
However, I now have a comfortable and smell-less quilt that my mom would be proud of!

Great quilt, I love the colours and fabrics. My mother has made me a few quilts before, so this post has inspired me to get them out and start using them again.
The best quilt will always be the one that someone else made for you!
Mothers always know best! Your quilt is beautiful so keep quilting. Look up how to make 2 triangle squares from 2 squares. It is often easier than sewing triangles together across the bias.
Thank you. This quilt has aged really well. I’ve made a few more quilts since but used stripes instead of triangles although this one is still my favourite.
This is absolutely gorgeous!! My daughter has been asking me for a quilt (I made her one several years ago but they upsized from a queen to a king bed so now she needs a new quilt. Would you be willing to share your pattern? I’d be more than happy to compensate you for it. I do not have an engineer’s brain.
Feel free to use the pattern from the picture. It was done such a long time ago I no longer have the pattern kept with me but I’m sure if you go search online, there will be more accurate patterns available.