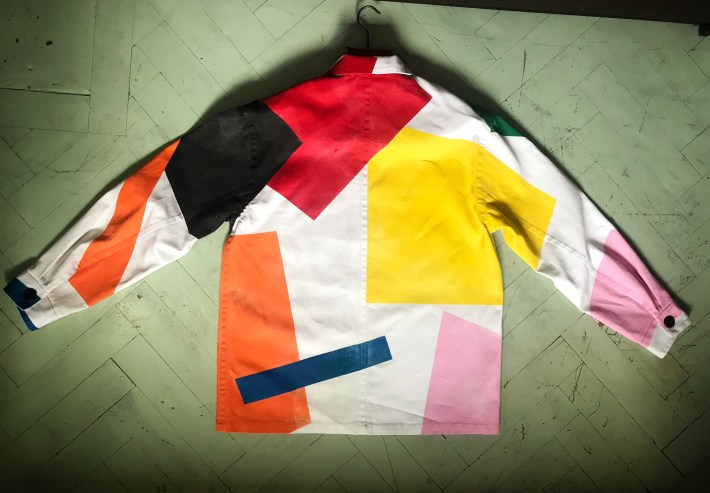
It’s been a while since I got technical in my work. A lot of my work has been very experimental and ‘loose’ but when it comes to design, it is very important that the research and development are reflected in the outcome. So let me go through my thought process in this one work jacket.
It all started with Matisse and especially his later work ‘The Cut Outs’. What might seem like blocks and shapes of colour being interpreted into objects (The Snail, for example) looks naive and simple but when you study the art work, you realise why he was the master of this technique. The technique seems free-form but requires a lot of thought. It is essentially painting with shapes. Watching a documentary about this work helped me understand the position he was in when he did this, his desperation to create even when he was frail and also the determination to tell his point of view, visually. Despite the darkness that led to this technique, his work was bright, happy and effortless.
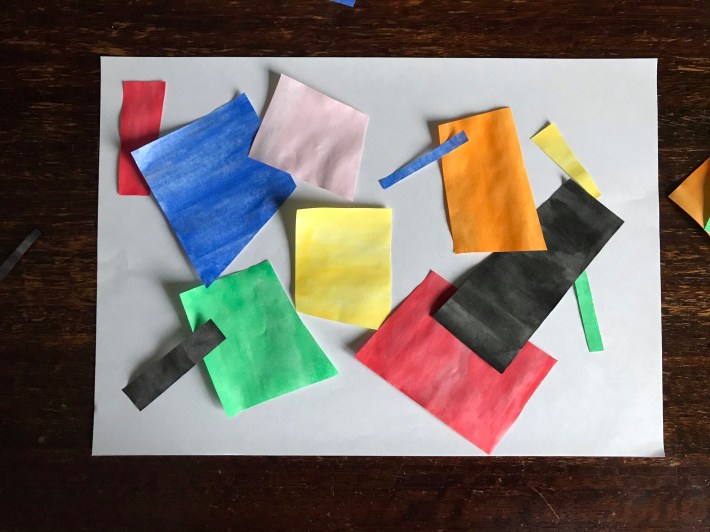
It was then when I saw a lot of exercises (aimed at kids) to create something similar; their own interpretation of whatever they wanted. So being a big kid myself, I decided to try it out. So armed with some paper, watercolours and scissors, I went on to create random blocks of colour as a starting point.

What I didn’t want to do was replicate one of Matisse’s famous work. I wanted to play around with the shapes until I found something I liked. As the afternoon went on, it dawned on me that this was no easy task. I arranged, re-arranged, cut and, at one point, scattered these blocks onto a white sheet of paper. Eventually, I was at a point of despair so proceeded to have an aperitif. That was when I started to see bits and pieces of shapes that I liked. It’s amazing what a bit of alcohol…..I mean relaxation can do for you. When I finally finished the piece, I aptly named it Rum & Coke as it resembled the mixture of ice, Coke and lime, glistening from the evening sun in the cut crystal tumbler I was drinking from.
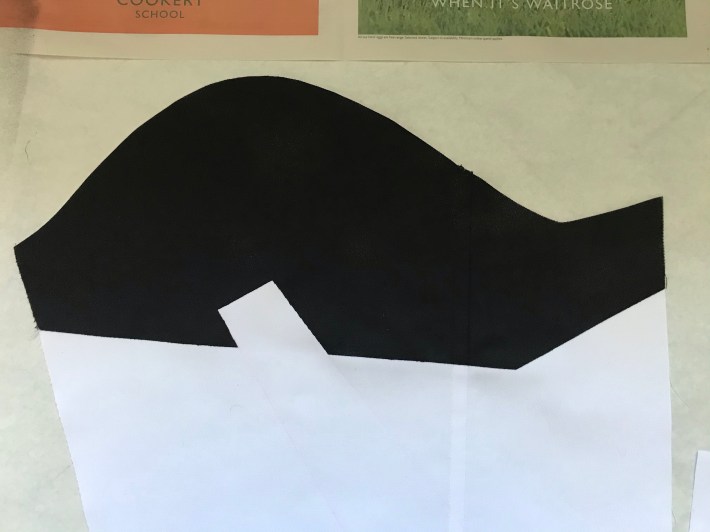
The pieces were then stuck down where they lay and I scanned it to create a digital image. Once this was done, I took a picture of the work jacket pattern and overlaid it on the image.
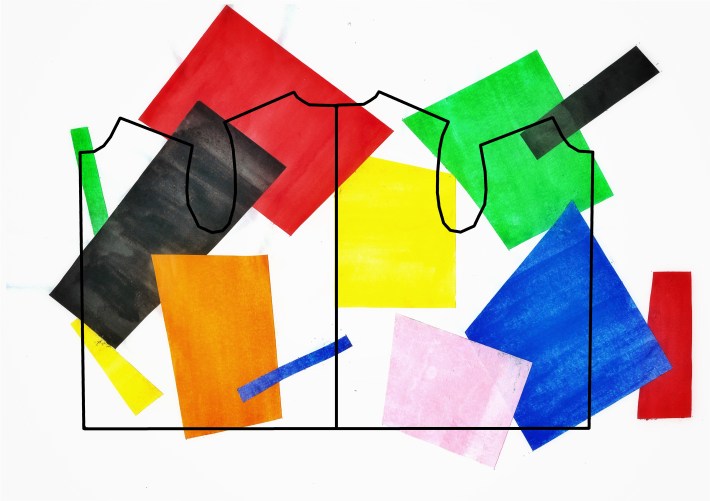
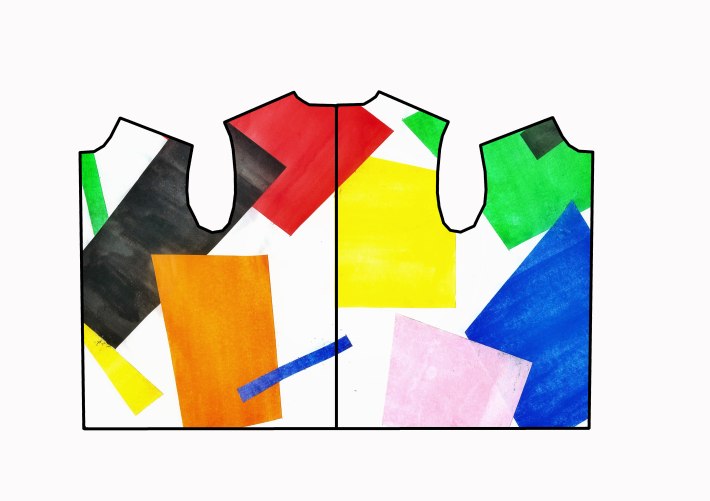
I then removed all the blocks outside the outline to give me an idea on how to transfer this print onto the work jacket.
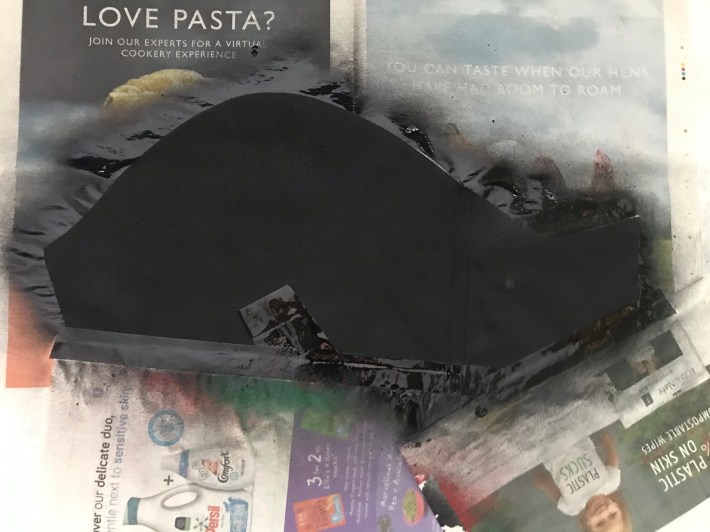
Before painting the garment, I had to source the correct fabric which in this case was a white cotton drill fabric left from a previous project. My next step was to cut the pattern piece out and sew the main pieces together. I constructed the front and back panels separate to the sleeves. I wanted everything to lay flat so that I could easily paint and iron the colour onto the fabric. As some of the blocks are quite big, I realised what a daunting task it would be to paint it on. Luckily, I discovered fabric spray paint in the art store. Although more expensive than standard fabric paint, it was going to cut down the amount of time I would spend painting and waiting for the paint to dry. With the spray paint, application should be quick and the stated drying time of 15 minutes was a Godsend.

I wish I could say everything went smoothly after that but more problems cropped up with using the spray paint. Although the paint did not bleed on the fabric, it does splatter so I had to find a method of protecting other areas where I do not want paint on. I also realised that some colours sprays beautifully but there are others that spurts and foams, creating a very uneven layer. I wasn’t sure if the can had been sitting on the shelves before lockdown or if it was a production thing. I did make sure that I shook the can well and also tested it on a piece of paper before actually spraying the fabric. Anyway, there was no turning back now, not especially when I’d spent a fortune on these spray paints.
I also wanted to make sure that the print matched on the front and into the sleeves so I spent a while drawing the outlines of these blocks and ensuring that it was triple checked before I moved to the next step: masking the areas which will not be sprayed. This involved some old newspapers and a roll of masking tape.
I ensured the masking tape was stuck down properly so I could get that perfect line to define the different colours.
One word of caution. The paint must be dry before you remove any of the tape and also ensure that your hands, elbow, knees and feet (I spray painted this on the floor) is clear of any wet paint. The last thing you want are smudges on the fabric. Having a hair dryer helps a lot in ensuring that the paint is dry. A rubbish bag is also useful to dump the masking tape into to prevent any cross contamination. (Please remember that sprays are chemical solvents that can affect your breathing so please open the windows or better yet, do it outside. Don’t forget your mask too!)
Once the paint is fully dry (I allowed everything to dry overnight just to be certain), it needs to be ironed on a medium heat to ensure that the paint is fixed on the fabric. This means that the garment can be washed on medium heat in the washing machine. When this is done, I continued to sew the pieces together and finished it by painting the thread to match the colour it has been sewn on. The process may be tedious but it ensured consistency in the work. Lastly, to ensure that the paint mimicked the washed out look of the watercolour, I chucked the jacket into the washing machine and gave it a quick wash. This also softened the fabric and tested the fastness of the paint.
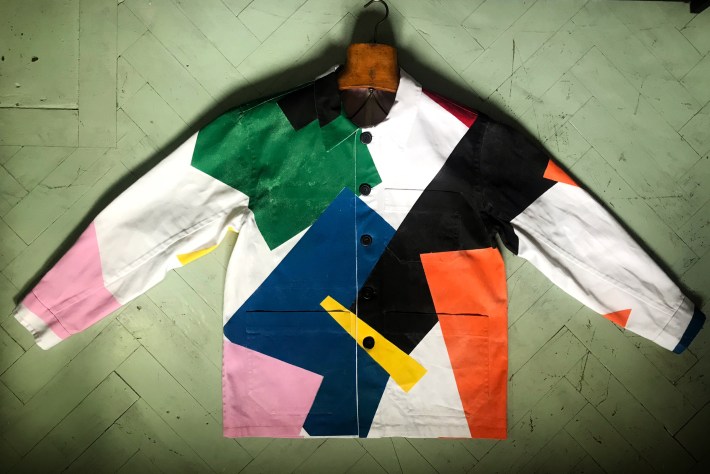
The end result is true to the artwork I created and cohesive, in terms of the flow of colour. In total, this garment took a week from conception to reality. The process might be fast paced but I had to break down all the stages and methodology to ensure that my ideas worked.
It is interesting to go through all these thought process as it is often taught to our art students. The mantra ‘practice what you preach’ is very important as I can now go back to the students and say that this method has been tried and tested. I know all the pit-falls and will be able to advise on the best methods. What is left is for the students to experiment and eventually come up with their own methods. It is always exciting to see the iterations that results from this one experiment.
So if you just see fashion as garments, think again. The thought process, the visual narrative, the inspirational research and the outcome gives you an idea of what the designer is trying to tell. So maybe before you walk into a chain store selling cheap fashion knock-offs or that super brand that ripped the design off someone’s Instagram, try looking at independent designers, especially those young designers who really have a story to tell. Your contribution will ensure that their stories go on and is heard by others. It’s time to go back to slow fashion and to own something that is meaningful, even if it is something simple that you made during lockdown. After all, like those designers, that’s your story to tell.

Gorgeous! I have used this fabric spray paint before too and had mixed results, so it’s not just you. But your final jacket turned out beautifully.
Thank you for your kind comments. It was weird using this spray paint as I really felt that I don’t have complete control over it but I guess it makes our work unique!
It turned so well! I could not do this , because Id have trouble with pattern matching at the sleeves and fronts, and because I wouldn’t have the patience to wait for the paint to dry!
A hair dryer works wonders in drying paint!