I am always intrigued at the thought process that goes through Yohji Yamamoto or Rei Kawakubo’s head when they cut these exquisite garments that goes on the runway. The details on the garments are amazing but at the same time simple. When you see these garments up close, you ask yourself why you didn’t think about making it that way but I guess that’s why pattern cutting is so amazing because the sky is the limit.
I may not be an genius like Yohji or Rei but I’d thought I would share with you my thought process when I am cutting a pattern. Before I start with my design, I need to emphasis that I am foremost a maker and not a drawer. I prefer to drape with the fabric or play with flat patterns. But regardless of the way I approach it, I tend to keep it simple and eventually add layers of complexities to it.
Recently I noticed that my white shirt was starting to wear a bit and since I have quite a lot of white fabric stashed away, I thought that I should make a new shirt for myself. That’s when I thought to myself of making something more interesting and different instead of a standard white shirt that looks the same as to everyone’s.
I quite like the design of a dinner shirt so I took it as a reference and reinterpret my idea of a dinner shirt. This all started with me doing quick sketches to explore the possibilities and I decided to start with a simple pleat.
I found that a lot of the time, people overcomplicate stuff and bite off too much to chew. Always concentrate on the basics first before trying to aim higher. Sometimes just sitting on the table, sketching your thought process and experimenting with a small piece of paper helps you understand the task much quicker. Once you understand the steps, then move on to a full size pattern. As usual, make sure you have a reliable block you can use and make a toile if this is your first attempt.
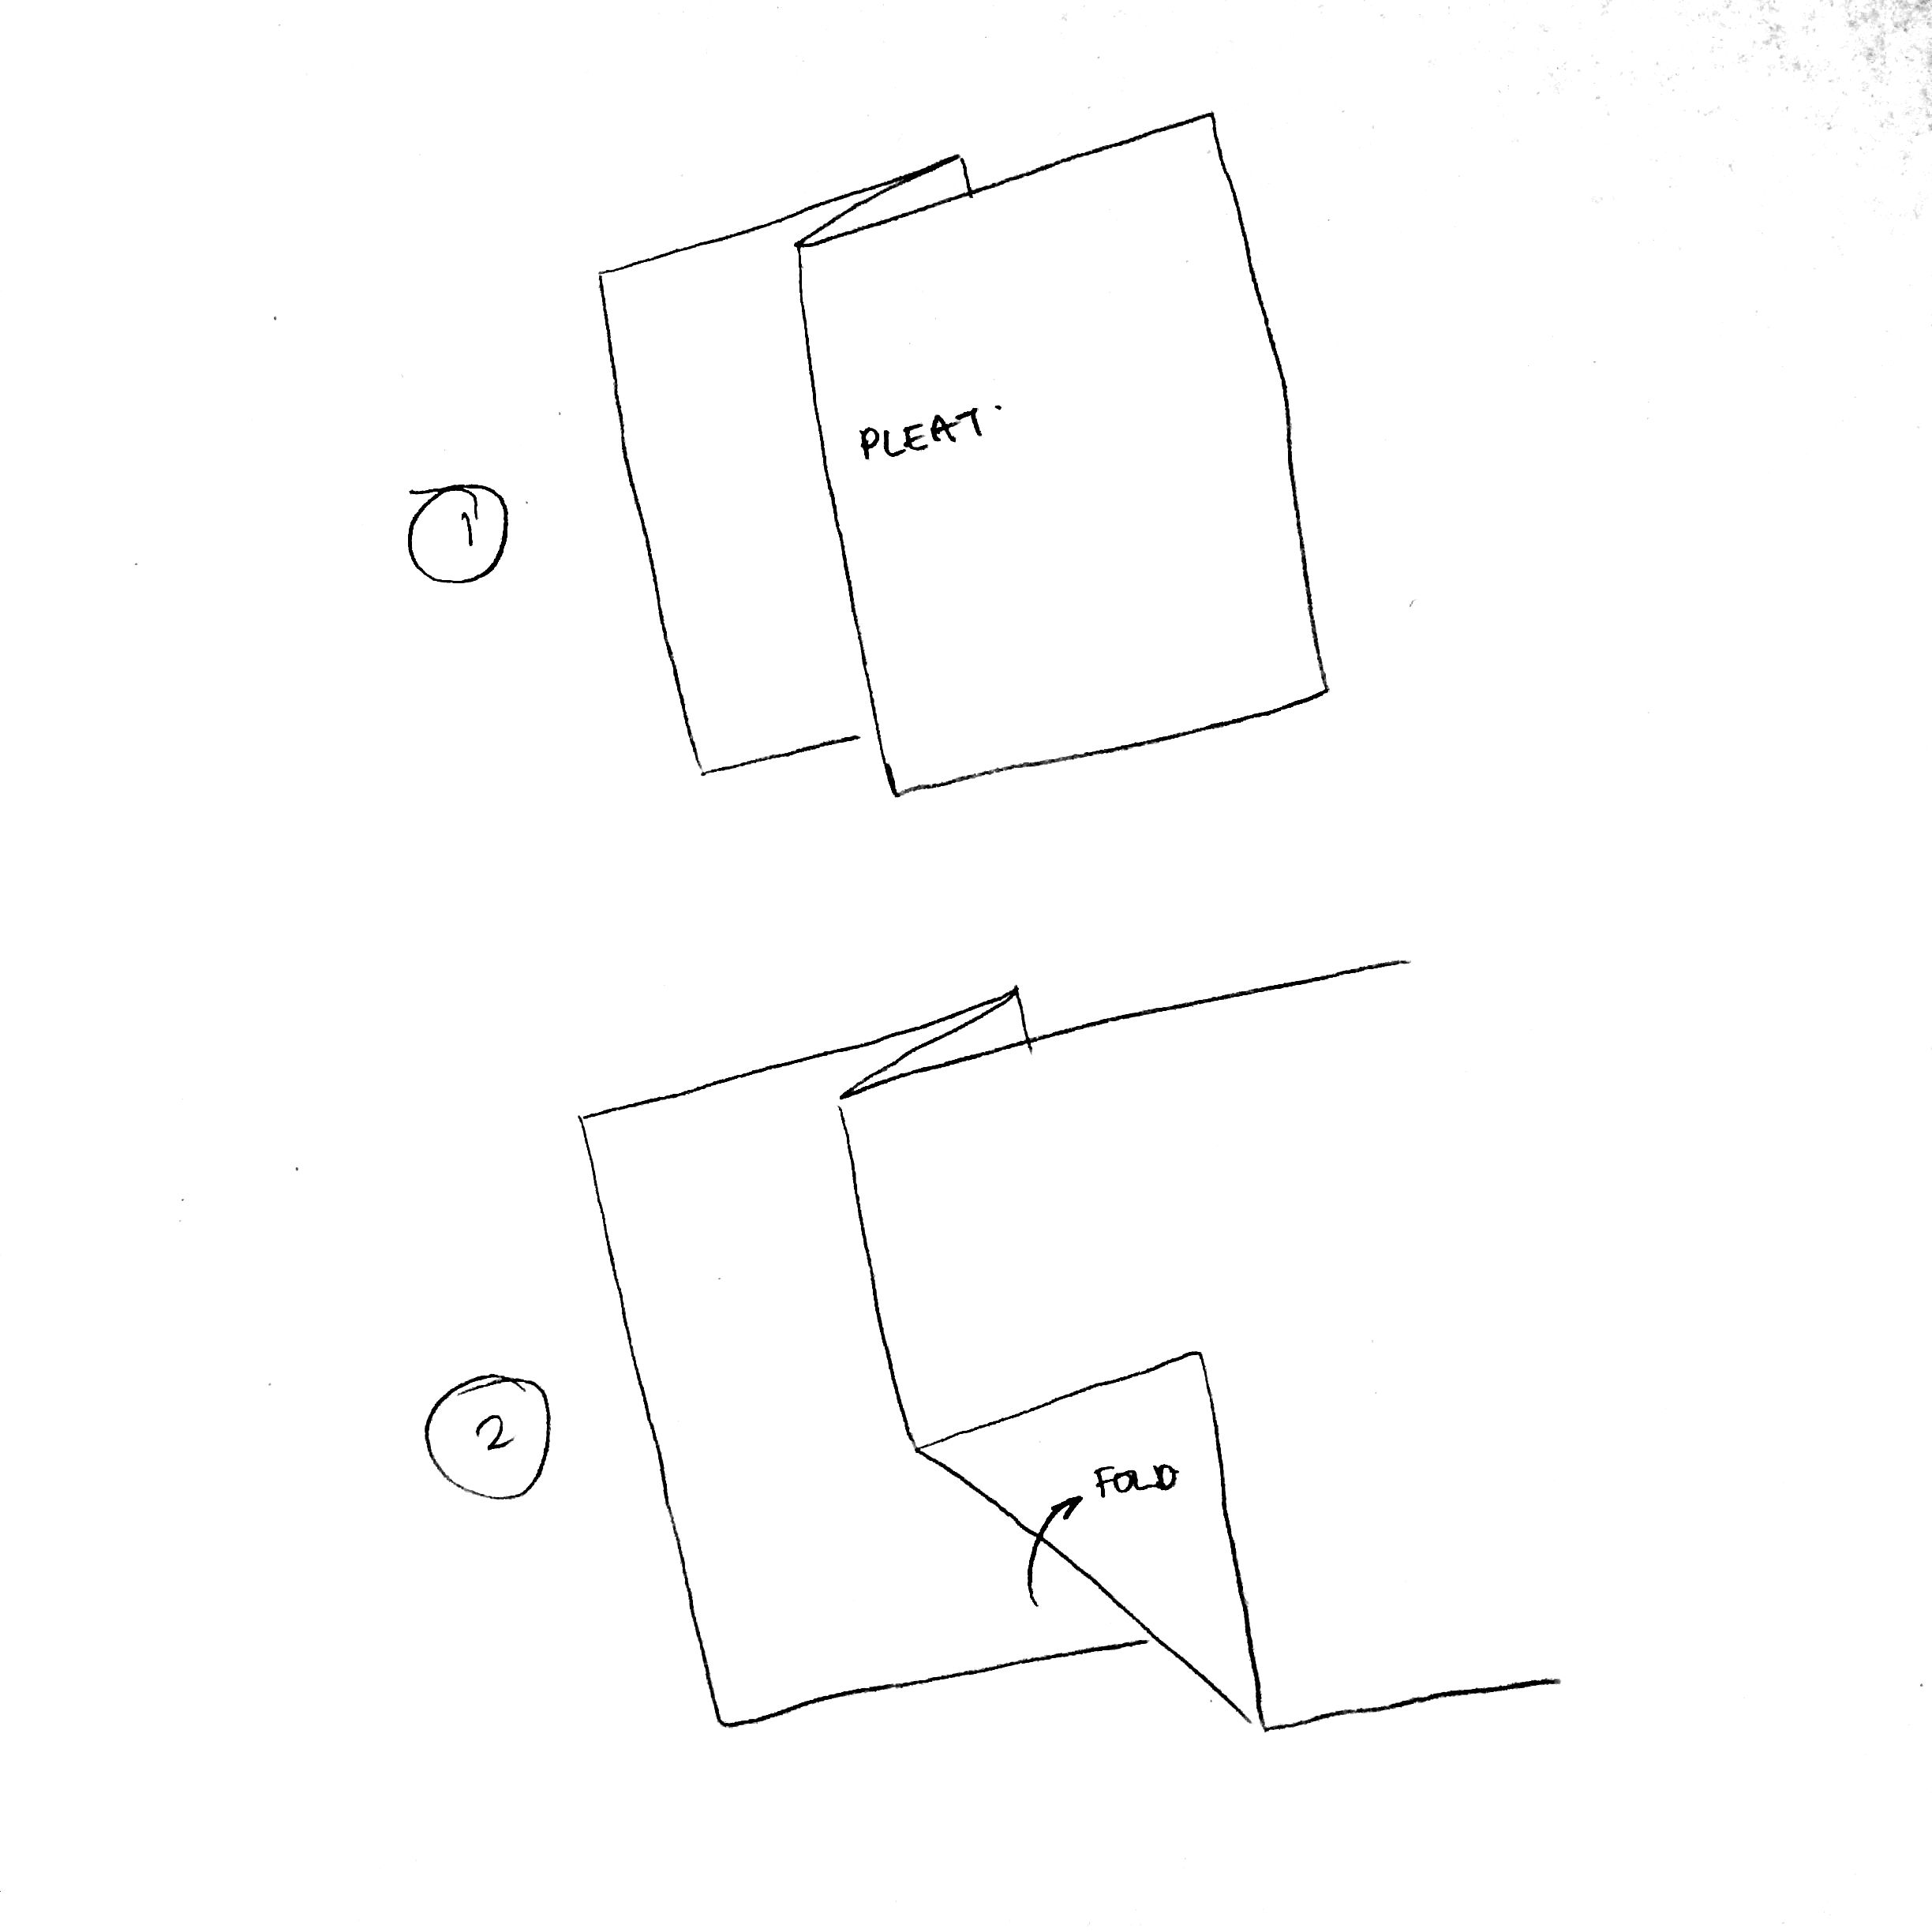
I started off with a long strip of pattern paper and started to sketch on the right side of the strip and chopped of the left side to replicate my sketches.
The paper folding was no bigger than an A4 piece of paper. At the moment, I don’t see the need to make an accurate representation of the pattern as I am just experimenting at this stage. Following this stage, an idea is appeared in my head and I quickly sketched out how this shirt could look like.
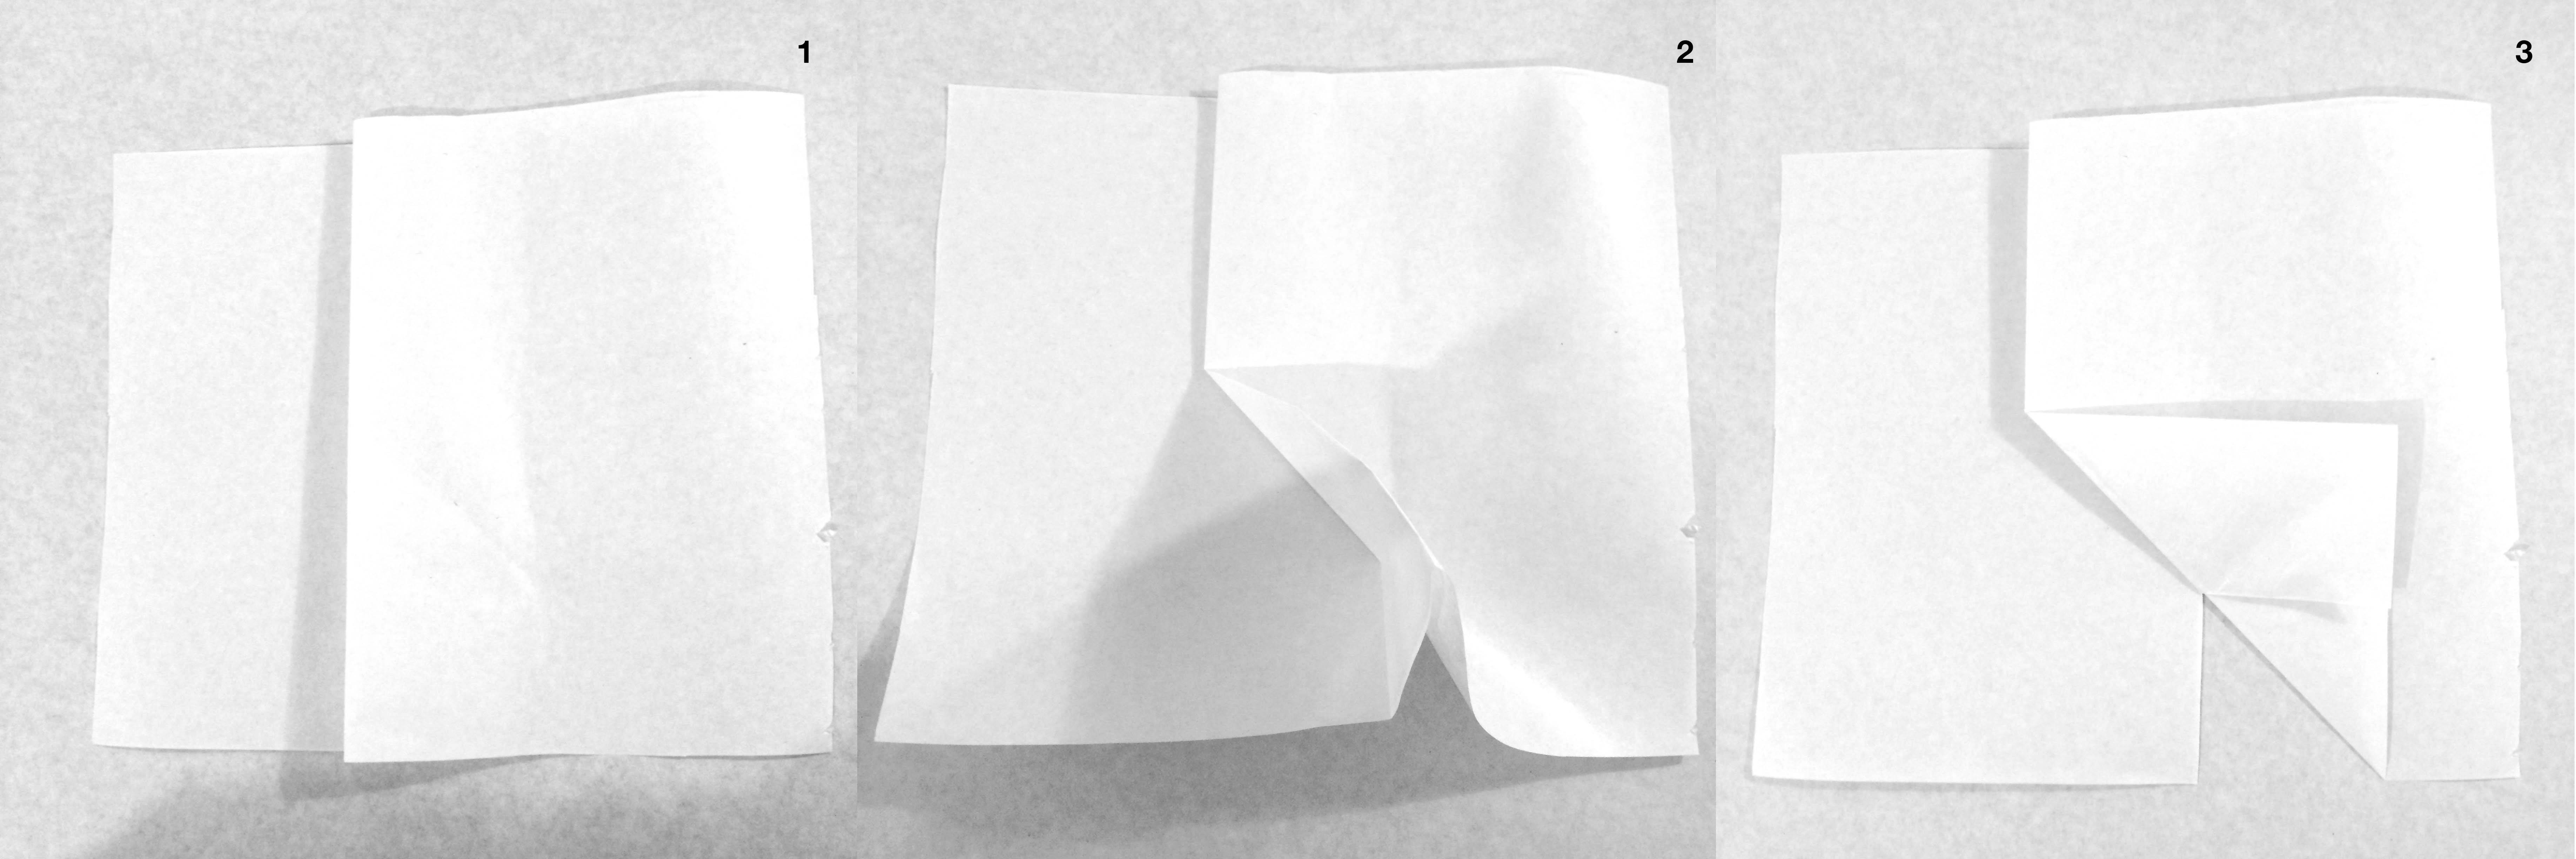
With the pleat and fold decided, I moved on to the next stage and quickly (and roughly) drew on a front shirt block. I found it quite important now to rely on the basis of a shirt pattern because for this instance I knew I had to pay attention to where the row of buttons on the shirt sat.

By step 1 above, I’ve also noticed the issue of a gap at the bottom part of the centre front, but this can be easily solved by cutting a strip and joining on to the main pattern as in step 3.
If by this stage there is an issue that I cannot solve, this means that the experiment has failed and I should approach it in a different way. But failures from experimentation is a good thing as I have now learnt from it and can approach it in a more effective manner. And because it only took me 10 mins to get to this stage, no significant time was wasted. This gives me a chance to make myself a nice cup of tea and start all over again.
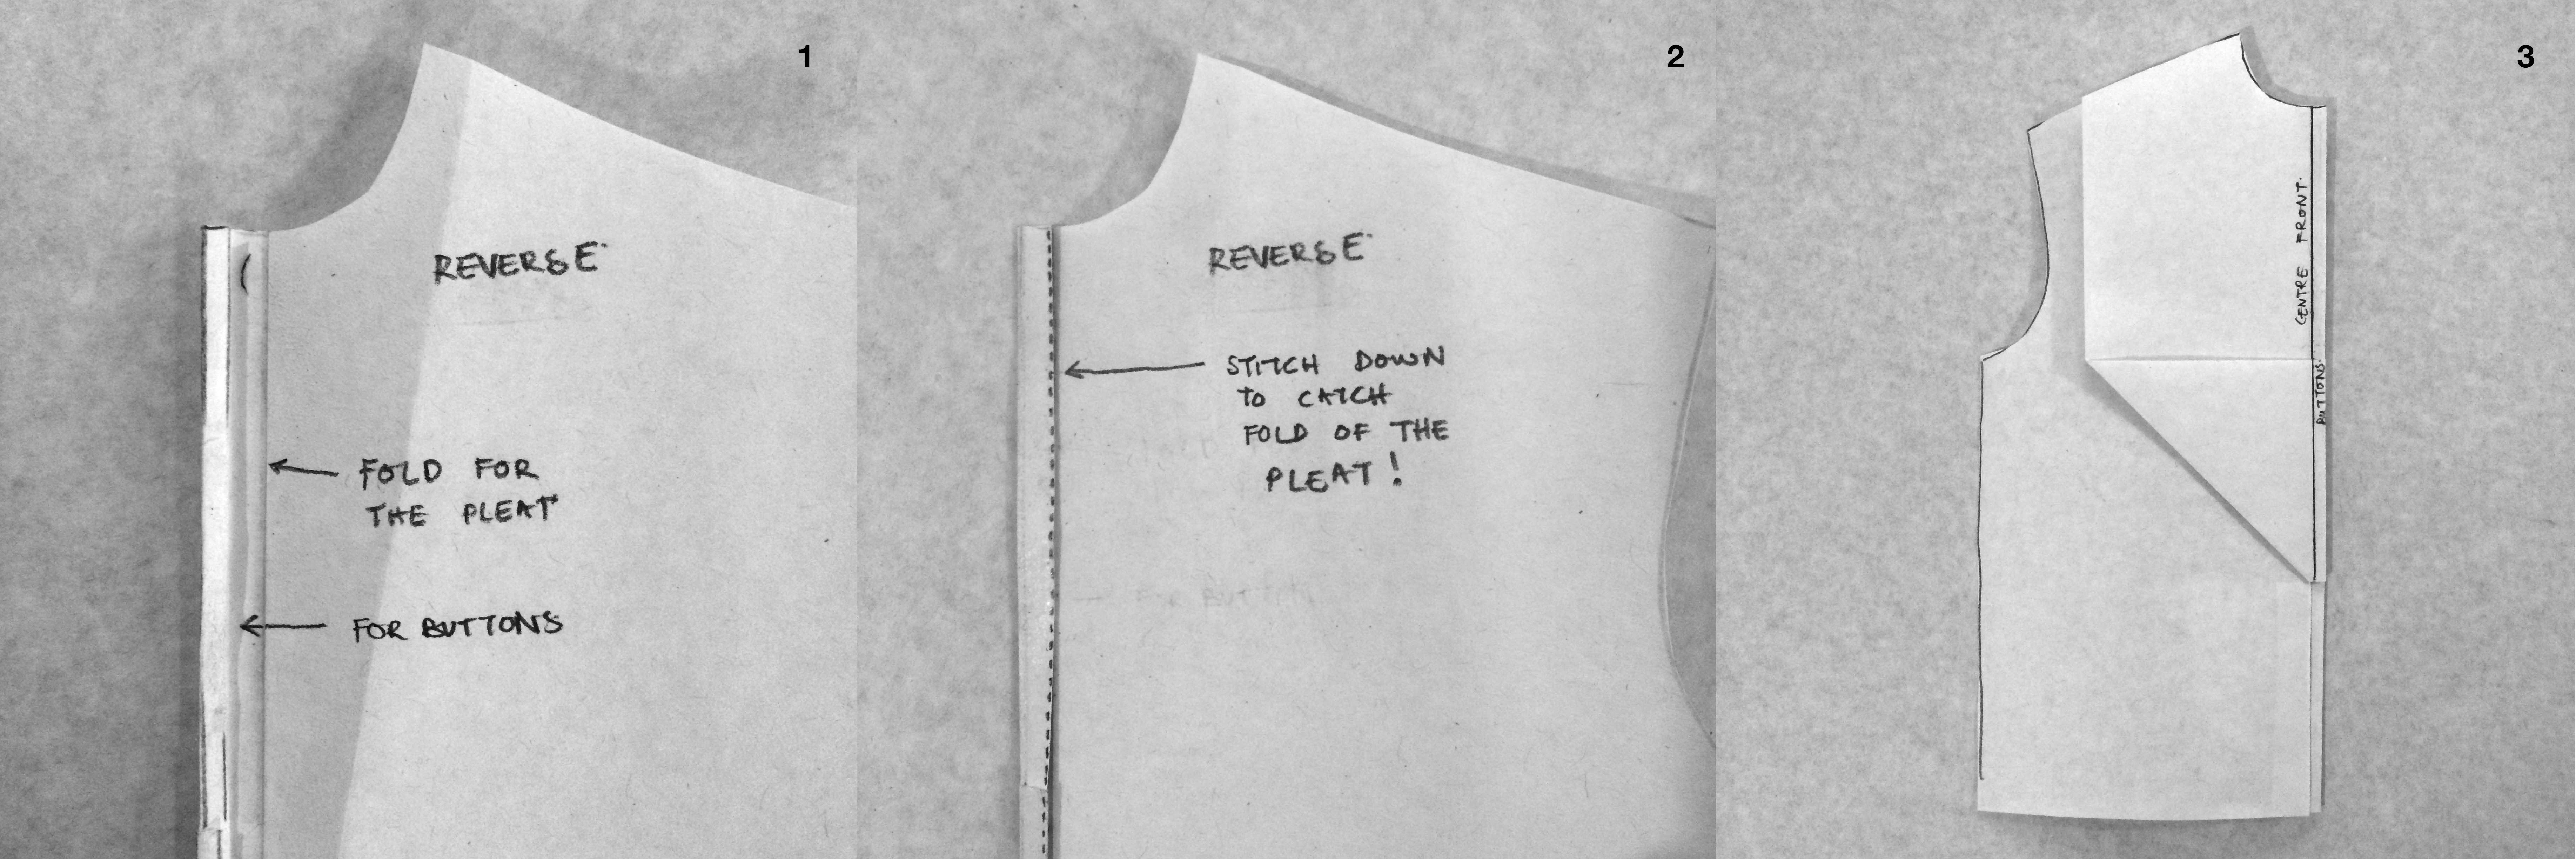
With this experiment going smoothly, I decided to tackle the pleat itself. As the top of the pleat is held to the yoke, I decided to securely fix the pleat on the centre front by folding the bit for the buttons back and ensuring that when I topstitch this bit down, I catch the fold of the pleat. It’s a quite difficult to explain this section as I couldn’t find a definition of what this ‘bit’ is called. Hopefully the picture makes sense.
With the rough pattern completed, I moved on to a full size pattern.

Turns out that they look quite similar.
Hopefully my thought process is not to chaotic and it shows you a method that I use when coming up with a pattern. An element with a pleat folded over can create something interesting and from this point, I could apply the same principles on the sleeve or yoke. I could make the pleat bigger or could add in more than one pleat and repeat the same process above.
And this all started with an idea, a reference and some experimentation. As for the actual garment, I’ve decided to call it a day and will cut and sew it another day!
After all, my nice cup of tea beckons!
